DIY skim bedding remington tactical style

The #1 community for Gun Owners in Indiana

Member Benefits:

  • Fewer Ads!
  • Discuss all aspects of firearm ownership
  • Discuss anti-gun legislation
  • Buy, sell, and trade in the classified section
  • Chat with Local gun shops, ranges, trainers & other businesses
  • Discover free outdoor shooting areas
  • View up to date on firearm-related events
  • Share photos & video with other members
  • ...and so much more!
  • Niles Coyote

    Plinker
    Rating - 0%
    0   0   0
    Apr 20, 2013
    111
    18
    S.W. Michigan
    I have wanted to try out a Bell & Carlson Tactical Medalist A3 since I first saw them a year or so ago. I had a few extra bucks from some OT at work so I splurged… The 308 Tactical is getting yet another face lift. I am impressed with the feel and quality of construction plus an added benefit, it’s a ¼ inch longer in pull so it should fit me a little better than the HS stock it is replacing… the backend doesn’t sound hollow either. Initial fitting was good but like to put a little love into my rifles and decided to skim bed it anyway. ;)

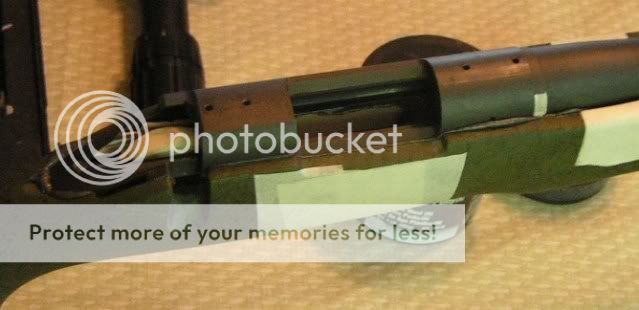
    Step 1: Strip action down and mask barrel to support the action. This will allow no play in the action while the bedding compound hardens and act as a centering guide with in the barrel channel. Tape sides and front of recoil lug, this makes it easier to remove the action from the stock after the compound hardens. Screw in action screw guides and tape to fill and center the screws in the stock’s action block. You want the action clean, so to remove gun oils I use rubbing alcohol for this.
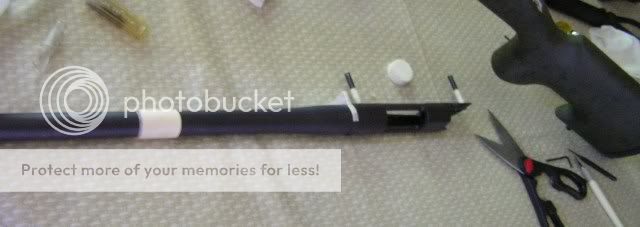
    bedding1001.jpg

    Step 2: Fill all voids with modeling clay
    bedding1002.jpg

    Step 3: Tape stock to form a little dam, I like to have a little barrel bed so I allowed about an inch and a half forward of where the lug will reside.
    bedding1003.jpg

    Step 4: Rough up the stock to give the compound something to adhere to and apply release agent (neutral shoe polish) to action and barrel. Apply the release agent on the barrel several inches forward of the lug. Be generous here as this keeps mistakes from happening.
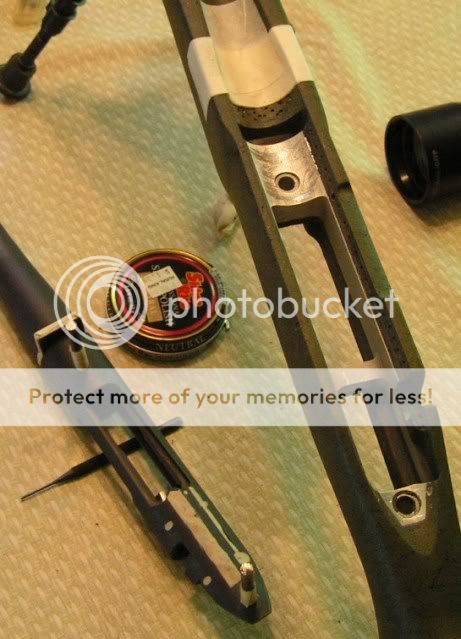
    bedding1004.jpg

    Step 5: Since I am using Devcon here, I weight out a 9/1 mixture of bedding and hardener.
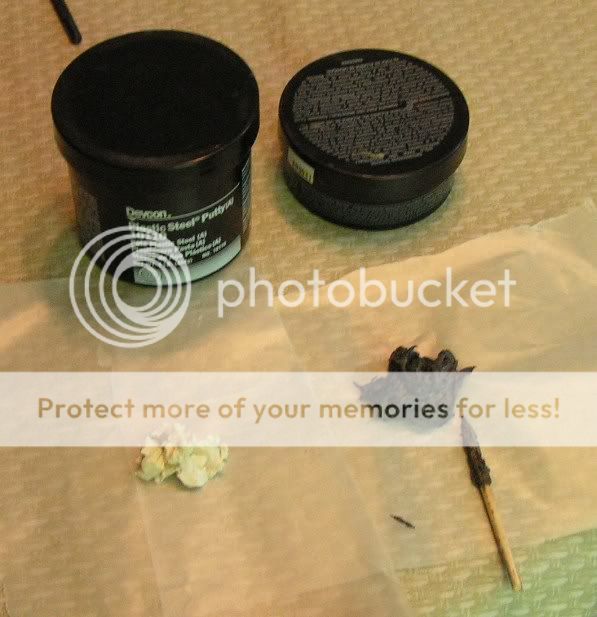
    bedding1005.jpg

    Step 6: After mixing/blending the two together for several minutes I apply the compound to the stock using toothpicks and work it into all the areas I want to be bedded and just about fill the lug well in the stock with compound.
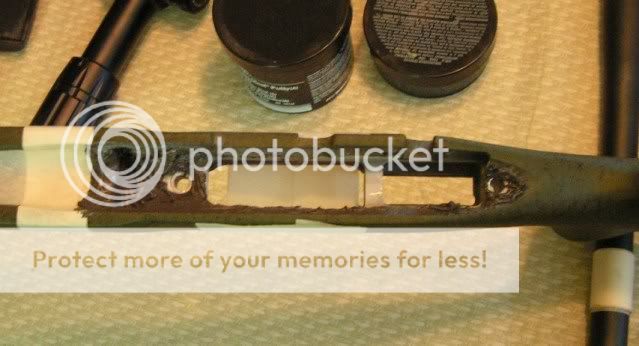
    bedding1006.jpg

    Step 7: Now apply a little compound around the action guides.
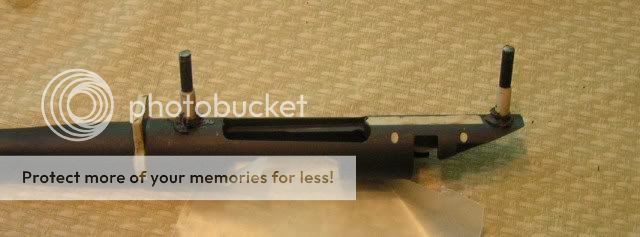
    bedding1007.jpg

    Step 8: Line the guides up and squeeze the action down into the stock until it can’t go in any deeper. Excess bedding will squeeze out around the action.
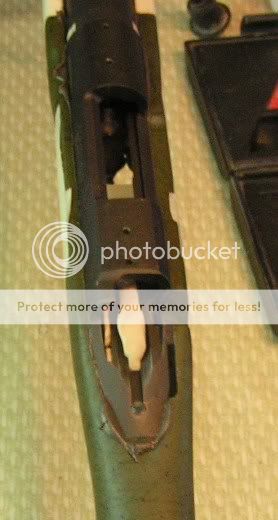
    bedding1008.jpg

    bedding1009.jpg

    Step 9: clean off the excess that squeezed out with toothpicks to get the bulk of the bedding off, then I go back with Q-tips loaded with WD-40 and wipe off the remaining compound.
    bedding1010.jpg
     
    Last edited:

    Niles Coyote

    Plinker
    Rating - 0%
    0   0   0
    Apr 20, 2013
    111
    18
    S.W. Michigan
    I keep left over bedding to use as my guide for when the compound has cured. In this case with the warm temps of summer it set up in 4.5 hours. During the winter it will take a little longer.

    Now that the bedding has cured it’s time to remove the tape that secures the stock and action together and also remove the action guides. Once done, I stand the rifle up on the recoil pad and grasp the barrel with one hand and the forearm with the other and begin pulling the two apart. It will take some strength if everything was done correctly, when it breaks loose it will pop all at once. Wiggle the action free and look things over.

    I forgot to take pictures of what it will look like when the action first comes out of the stock but like the pictures above where the excess squeezed out around the action you will have excess compound that squeezed out into the trigger and magazine box voids.

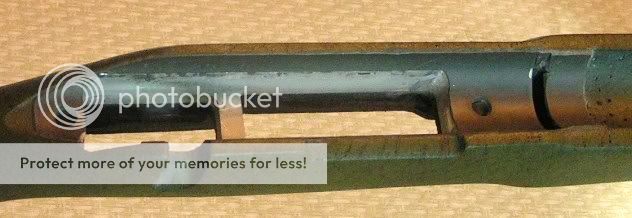
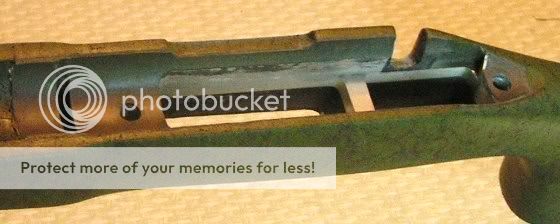
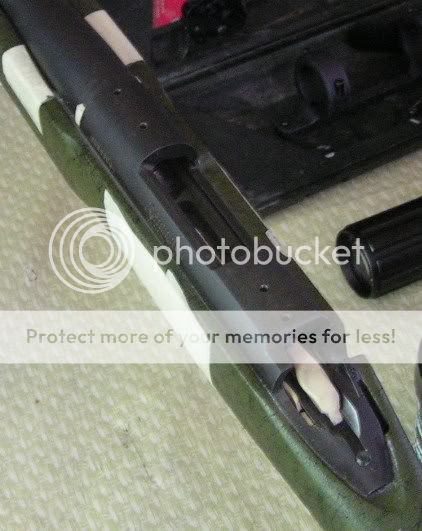
    Now it’s time for clean up. I start with the action and remove all the clay and tape, be sure when you are done to clean the bolt recesses, chamber and run a patch or two down the bore to make sure no clay fell where it doesn’t belong. With the action clean now I move to the stock. There is several ways one can do this but what I do is begin with the barrel channel. You should have spillover on the dam you made with the tape. I score this with a hobby knife as deep as I can, going over it several times. Once I have a deep grove cut almost to the tape I pull the tape up as far as I can and break the spillover off. Now I move to the magazine box and trigger area and using either a hand file or dremel with a stone bit, I remove the spillover. If you use a file, be sure to file only on your down stroke to avoid chipping bedding off that you don’t want to remove. Take your time… Once done you will end up with something like this.
    bedding2002.jpg

    bedding2001.jpg

    Reassemble the rifle and do a safety check. I don’t shoot the rifle until the bedding has had a day or two to completely cure.
     
    Last edited:

    Niles Coyote

    Plinker
    Rating - 0%
    0   0   0
    Apr 20, 2013
    111
    18
    S.W. Michigan
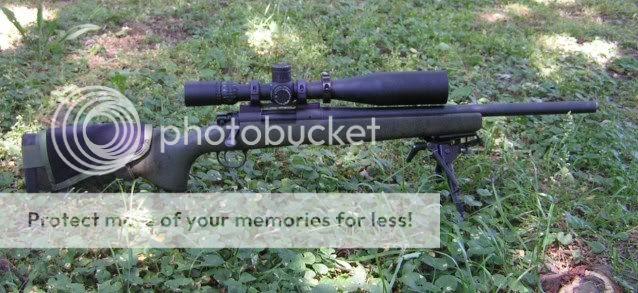
    And its current configuration, I think it’s going to stay this way for a while.
    009-1.jpg


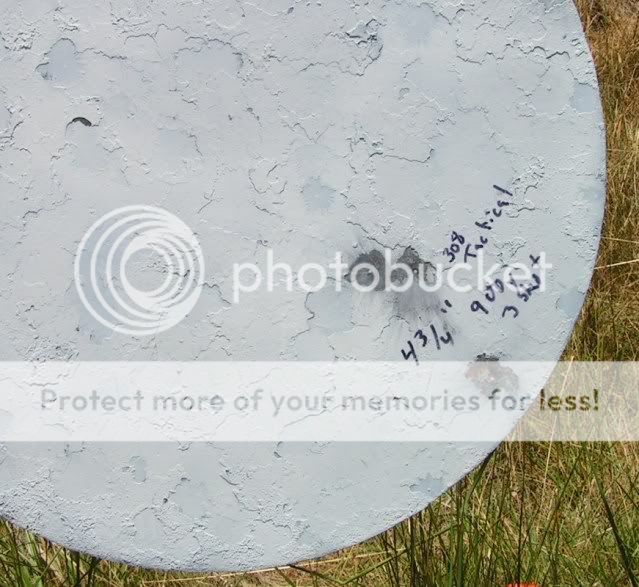
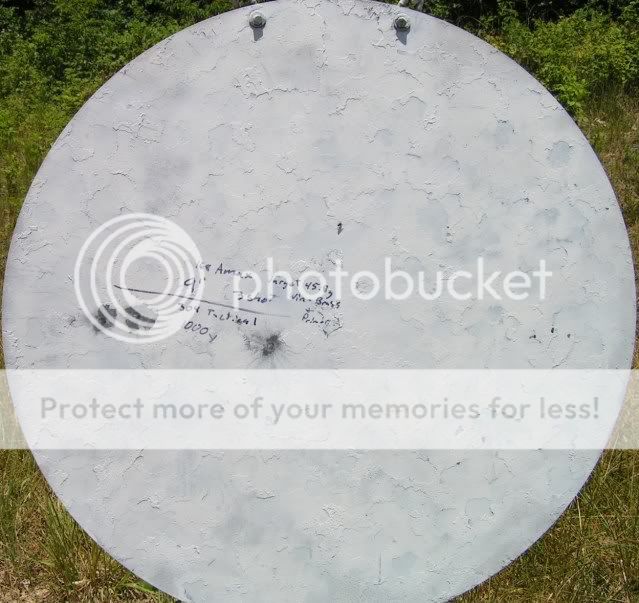
    The wind this day was strong (10-14mph)was coming straight down range with just a tickle coming across at 600, maybe a quarter value from time to time. Made for a nice day at Youngs.

    I present my best 900 and 1000y group to date out of this rifle.
    003-4.jpg


    006-4.jpg
     

    DocIndy

    Master
    Site Supporter
    Rating - 100%
    38   0   0
    Mar 30, 2010
    1,931
    149
    Franklin
    I like to use Brownells Acra Glass Gel bedding kits. The regular Acra Glass kits are too runny for me. I use modeling clay to make the dam in the barrel channel. My Howa was bedded into the Bell and Carlson with a gel kit and I used a Dremel to add some "pores" to the bedding area to get lots of bite. The release agent they include in the kits works awesome. Yours turned out really nice. I haven't used the Devcon, but am thinking of trying it on my .458 Socom build.
     

    Niles Coyote

    Plinker
    Rating - 0%
    0   0   0
    Apr 20, 2013
    111
    18
    S.W. Michigan
    I agree and post such in that thread as well. Thanks, it was intimidating at first but all worries were gone after my first one... just don’t forget a release agent and block anything off where you don’t want bedding and take your time...
     

    Leo

    Grandmaster
    Rating - 100%
    30   0   0
    Mar 3, 2011
    9,804
    113
    Lafayette, IN
    First, I would like to say that it looks like Niles did a GREAT job on the bedding. It takes a lot of patience and work to get the job done that nice.

    I am a little curious of why a rifle stock with a metal bedding block would need to be bedded. I have bedded and installed pillars many wooden stocked rifles and all of them improved in consistancy, so I see that benefit.

    When I switched to H&S stocks with the aluminum insert, I just used an inch lb torque wrench set on 45 inch lbs and all was good. All my match rifles were Model 70's that have flat bottoms on a forged receiver. Maybe the round bottom receivers still need bedding? I am trying to figure it out, If I am overlooking something, help me out. I'll not be offended.

    I have a new heavy barrel Remington that the factory stock stinks, and upgrading stocks is on my "to do" list before I condem the rifles barrel.
     

    Niles Coyote

    Plinker
    Rating - 0%
    0   0   0
    Apr 20, 2013
    111
    18
    S.W. Michigan
    First, I would like to say that it looks like Niles did a GREAT job on the bedding. It takes a lot of patience and work to get the job done that nice.

    I am a little curious of why a rifle stock with a metal bedding block would need to be bedded. I have bedded and installed pillars many wooden stocked rifles and all of them improved in consistancy, so I see that benefit.

    When I switched to H&S stocks with the aluminum insert, I just used an inch lb torque wrench set on 45 inch lbs and all was good. All my match rifles were Model 70's that have flat bottoms on a forged receiver. Maybe the round bottom receivers still need bedding? I am trying to figure it out, If I am overlooking something, help me out. I'll not be offended.

    I have a new heavy barrel Remington that the factory stock stinks, and upgrading stocks is on my "to do" list before I condem the rifles barrel.


    Thanks for the complement.

    Any mass produced product can have variations from one to the next. This includes both the rifle/action and the molded in aluminum chassis/bedding block. The idea behind skim bedding is to marry these two together in a stress-free way so any imperfections between the two are corrected. That’s the thinking behind it now what I observed.

    I did use the stock without bedding and it shot much better than the factory stock.This was to be expected as the hogue stock had a weak forarm that touched the barrel whenever support was used while shooting (bipod or sandbag). With the B&C as well as the HS I had on before it, I still had occasional fliers that I could not explain. Now I am not talking major deviations in impacts but outside the group as a whole.

    After bedding these went away and my average group size also decreased in size. It’s been awhile but IIRC the unbedded rifle was shooting in the mid .7’s at 100 with occasional smaller groups and occasional fliers that may open groups up to about an inch. This being all 5 shot groups. After bedding it became a solid mid.5-.6 and no unexplainable fliers.

    I have done this on several factory barreled Remingtons and in every case consistency improves if not overall group size as well.
     
    Last edited:

    Niles Coyote

    Plinker
    Rating - 0%
    0   0   0
    Apr 20, 2013
    111
    18
    S.W. Michigan
    Whats the twist on your barrel and whats the data on your rounds?

    1-12 twist.


    The load used in the pics was 45.8 varget in winchester brass and primer with the 168 a-max seated about 2.828" COAL. The bullet has a long jump to the lands but just about every bullet (match types) have handled it will. My standard long range load in this rifle (up to this point) had been a 175 smk with 44.5 varget in win. brass and primer giving me 2540-2550 fps at the muzzle.

    I have been very impressed with this rifle as it has shot every bullet I have tried well. From 155 &168 a-max, 168 noslers CC's, 168, 175 and 180 smk's and 168 and 190 bergervld's. All of these bullets have been seated between 2.815-2.830 and shot fantastic but each has its preference...


    Leo

    Grandmaster
    Rating - 100%
    30   0   0
    Mar 3, 2011
    9,804
    113
    Lafayette, IN
    I have been very impressed with this rifle as it has shot every bullet I have tried well.

    That's the sign of a great barrel.

    I have a heavy barrel Remington that shoots exactly one bullet great, and one grain of powder higher or lower goes back to hunting rifle accuracy. My Winchester Coyote varmint rifle only shot great at full power, heavy bullet loads.

    Using factory rifles, I used to spend a lot of time developing a load, even with general aftermarket barrels. Then I turned down a barrel from a top line HART bench rest quality blank. The first Sierra Matchkings I put in it shot a tight group. Heavier match bullets, lighter match bullets, more powder, less powder, Nosler, Berger, Sierra, ALL shot great. The Douglas Ultra match blanks were similar. After that, I always spent the hundred more for the best barrel blanks.
     
    Top Bottom