All Things Woodworking

The #1 community for Gun Owners in Indiana

Member Benefits:

  • Fewer Ads!
  • Discuss all aspects of firearm ownership
  • Discuss anti-gun legislation
  • Buy, sell, and trade in the classified section
  • Chat with Local gun shops, ranges, trainers & other businesses
  • Discover free outdoor shooting areas
  • View up to date on firearm-related events
  • Share photos & video with other members
  • ...and so much more!
  • amboy49

    Master
    Rating - 83.3%
    5   1   0
    Feb 1, 2013
    2,300
    83
    central indiana
    You can do some good work with a lot of budget friendly tools. As the saying goes, it's a poor craftsman that blames the quality of his work on his tools. For example, I have a 20 year old loss-leader promotional table saw from Craftsman, but I can get good work out of it. Cabinetry quality stuff. I could make furniture. A dovetail jig, however, is one of those buy once cry once tools. It's worth getting a good one if you plan to use it. You will drive yourself absolutely toys in the attic trying to get a functional joint out of a cheap flimsy jig.

    I'm on my way up to Lowe's to get the lumber for a ramp up to my front deck. It's primarily for my mobility scooter that I use part time, but I'm going to put in some holes up top to mount a winch so I can pull heavy things up without messing up my back. I get an indescribable sense of confidence and pride from being able to do all these things for myself.

    I agree expensive tools are not the sole solution to fine carpentry and no substitute for talent and hard work. On the other hand, poor tools can handicap anyone. Saws that won’t maintain settings for square cuts, inadequate machinery to properly do a given job -
    lack of a joiner, planer, etc.- and related items can both help and hinder the process for fine carpentry.

    Having an expensive dove tail jig and a high dollar router will enable you to cut great dovetails - but then the same person will never learn to hand cut dove tails. Depends on what your goal is. Wanna say you built a fine piece of furniture without using one single power tool ? That’s great. Wanna show off a great project where you used all the latest gadgets. That’s fine too. To each his own.
     

    Loser

    Plinker
    Rating - 0%
    0   0   0
    Mar 19, 2021
    5
    3
    Ft.white,fla.
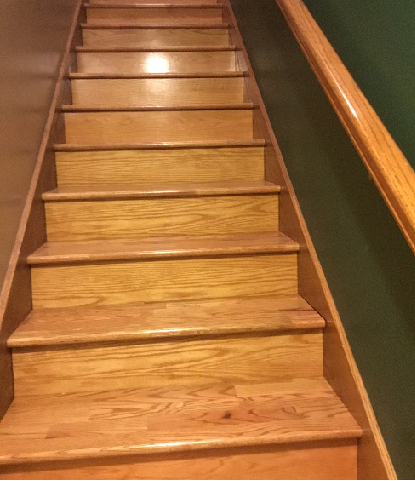
    Most of my woodworking goes towards the house these days. Here is a project I finished this spring- used to be ugly carpeted stairs:

    stairs2.png


    attachment.php


    These are the stairs to the basement. I still have to complete the stairs to the 2nd floor.
    Nice..Very Nice..
     

    HoughMade

    Grandmaster
    Rating - 0%
    0   0   0
    Oct 24, 2012
    35,768
    149
    Valparaiso
    anyone do any poured resin tables? I want to do one with a ship's wheel inside. watching a ton of YouTube videos
    Did you ever get this project done?

    I am all prepped to do a "river table" pour for the top of my media console table, just waiting on the resin to arrive. Any tips would be appreciated.
     

    chocktaw2

    Home on the Range
    Site Supporter
    Rating - 100%
    2   0   0
    Feb 5, 2011
    61,470
    149
    Mayberry
    Did you ever get this project done?

    I am all prepped to do a "river table" pour for the top of my media console table, just waiting on the resin to arrive. Any tips would be appreciated.
    How are you applying the resin? A buddy done some walnut end tables, used pantyhose to apply the finish. Stuff looked 1/4' thick, came out really nice.
     

    MRockwell

    Just Me
    Site Supporter
    Rating - 100%
    5   0   0
    Oct 4, 2010
    2,829
    129
    Noblesfield
    Curious question, where does everyone get their lumber from? Box store or lumber yard or do you mill it yourself?
    My go to is Frank Miller Lumber in Union City.

    I do have a decent stockpile of lumber I have milled my self, but the right project has to come up to dig into the varied species I have on hand.
     

    HoughMade

    Grandmaster
    Rating - 0%
    0   0   0
    Oct 24, 2012
    35,768
    149
    Valparaiso
    Well, here goes nothing.

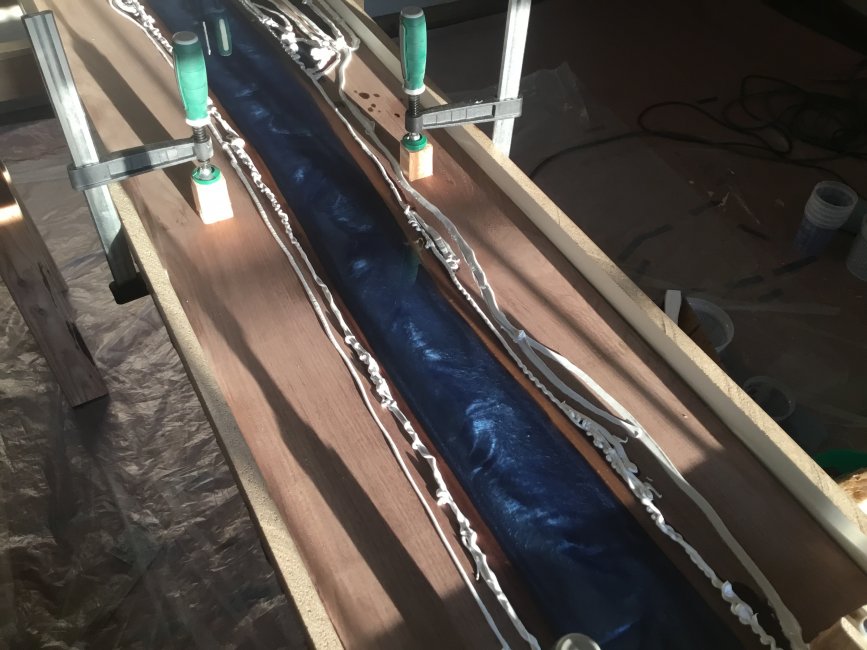
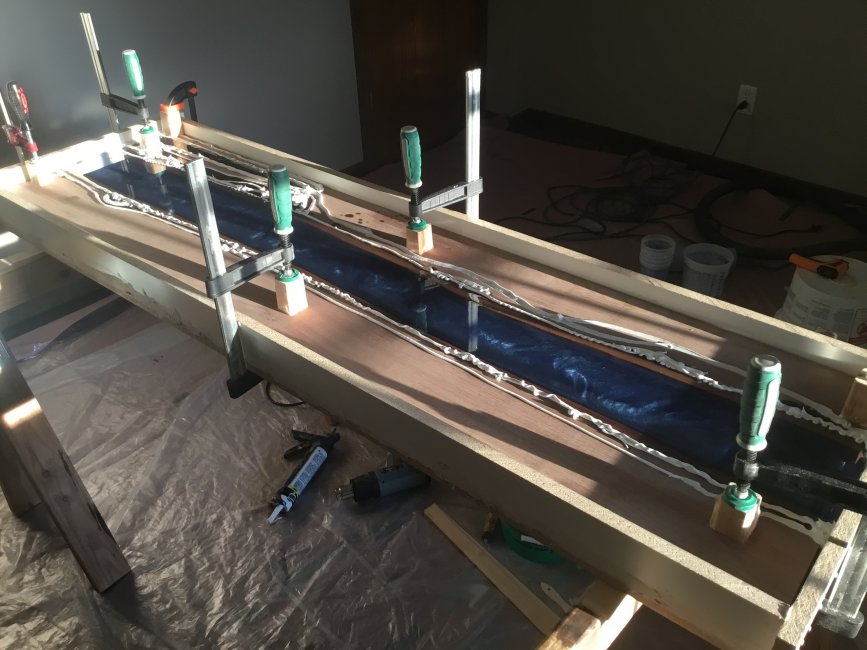
    I did the pour this afternoon. I carefully followed all of the instructions. One thing I was surprised about is how many people on YouTube don't mix as long as the instructions say. I went beyond what the instructions said.

    I suspect that the negative reviews on Amazon for the epoxy is people following the YouTubers and not the instructions on the bottle.

    The instructions said to mix for at least 5 minutes, scraping the sides often. I mixed for 6+ minutes and scraped the sides once a minute. THEN you are supposed to pour the epoxy into another clean bucket and mix for "at least" another 3 minutes. I did it for 4+. This epoxy isn't cheap and doesn't gel for over 12 hours so why would I not follow all the instructions and mix and mix and mix?

    I am checking it every 45-ish minutes unti it gels. I have to slowly stir to keep the metallics from settling out. I used "ocean blue" and pearl powdered pigments. I am also checking temperatures with a laser gun. It is in an air conditioned room around 70 degrees which is supposed to be correct. If it starts heating up as it cures too much (the cure is an exothermic reaction) I can add fans. About 2 hours in, the epoxy is about 3 degrees warmer than ambient temperatures. You want to keep it under 120 degrees.

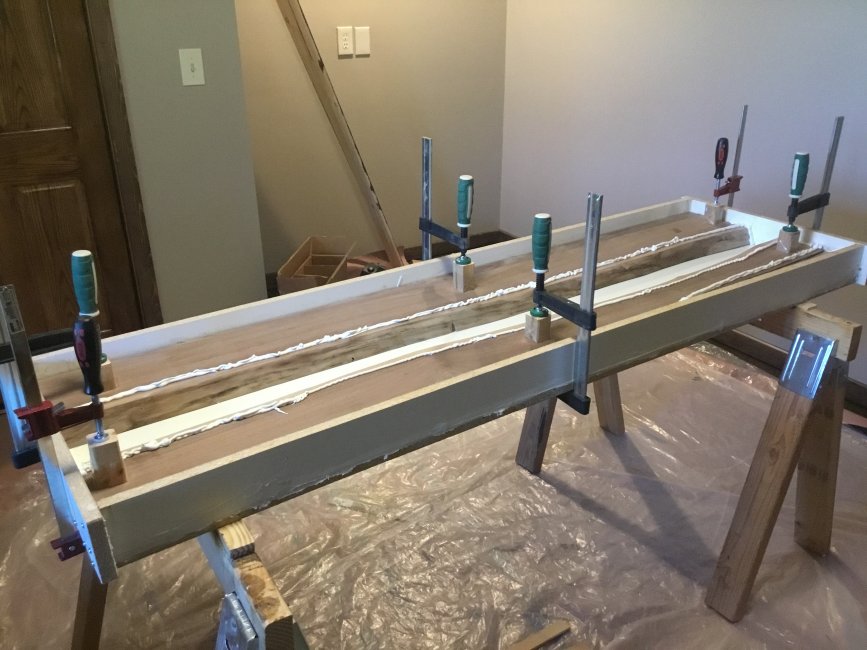
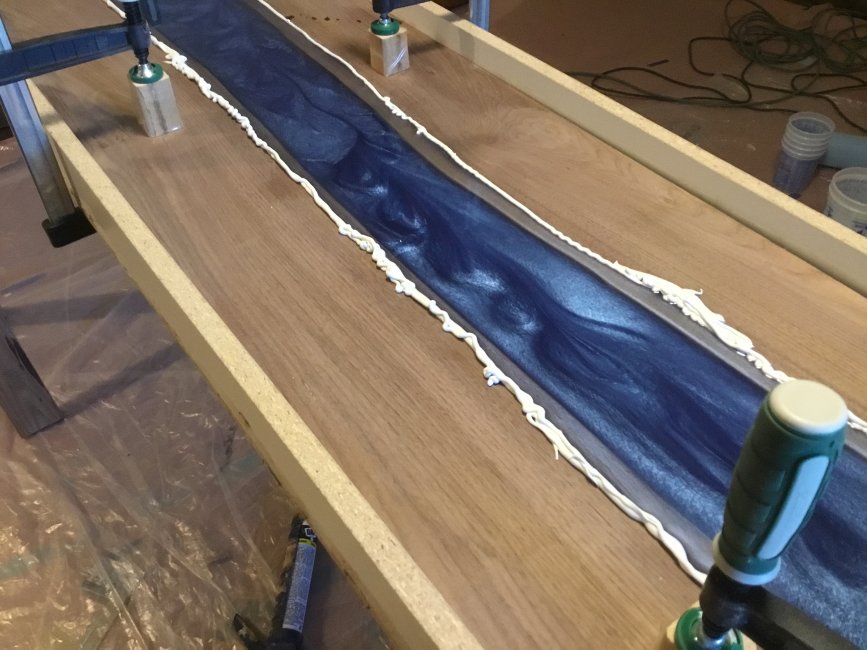
    Pics of the mold before the pour and after the pour.
    3A1AE337-4D0B-4348-9D31-0FC51C34268D.jpeg EAAB7308-B0BF-42E1-98C4-C874CACF4F6B.jpeg
     
    Last edited:

    HoughMade

    Grandmaster
    Rating - 0%
    0   0   0
    Oct 24, 2012
    35,768
    149
    Valparaiso
    I'm about 14 hours post pour. Up until I went to bed last night, I checked the temperature and slowly stirred the epoxy to keep the pigments suspended every 45 minutes. Then I got up once overnight at 2:30a to do the same.

    With a room temperature of about 70-72 degrees, when I went to bed, the epoxy was close to 80. In the middle of the night, it was in the mid-80s. It is about 90 degrees this morning which is perfect. I'm pretty sure that there will be no runaway exothermic reaction at this point, just a nice, slow warming.

    I stirred one more time this morning and the epoxy is pretty thick now. It was just a bit thicker than water when I poured, think 5w30 at room temp. Now it's like straight 40 weight on a cold morning. No more stirring or bubbles will be trapped and I don't think the pigments will settle at this point.

    Now, I just let it sit. 72 hours at a minimum which would be Weds., but I won't have time to get back to it until Thursday, so that's all the better. It is 69" long and 19" wide. I have a friend who happens to have a 20" planer, so I'll have to let him know I will be ready for that step in a few days.

    I had a couple of areas where the epoxy seeped over and under the caulk "dams", and I added "backup dams" but I haven't had any breakthroughs since yesterday late afternoon, so I think I'm good now.

    066BA8D8-0797-46E9-9733-D5B96002F2A7.jpeg 9EA5E887-F817-4AF1-9C53-3785AE594918.jpeg
     
    Last edited:

    schmart

    Sharpshooter
    Rating - 100%
    5   0   0
    Nov 10, 2014
    566
    47
    Lafayette
    Curious question, where does everyone get their lumber from? Box store or lumber yard or do you mill it yourself?
    I have milled most of it on a friend's mill. I do occasionally monitor Craigslist and now Facebook marketplace and have found good deals from individuals. I stay away from Box stores or traditional construction type lumber yards for hardwoods. I've used Hollingsworth lumber in Russiaville for domestic and just found Northwest Lumber Company for exotic woods (they have domestic as well).
    --Rick
     

    B40B

    Marksman
    Rating - 100%
    1   0   0
    Oct 29, 2020
    256
    43
    Valparaiso
    I'm about 14 hours post pour. Up until I went to bed last night, I checked the temperature and slowly stirred the epoxy to keep the pigments suspended every 45 minutes. Then I got up once overnight at 2:30a to do the same.

    With a room temperature of about 70-72 degrees, when I went to bed, the epoxy was close to 80. In the middle of the night, it was in the mid-80s. It is about 90 degrees this morning which is perfect. I'm pretty sure that there will be no runaway exothermic reaction at this point, just a nice, slow warming.

    I stirred one more time this morning and the epoxy is pretty thick now. It was just a bit thicker than water when I poured, think 5w30 at room temp. Now it's like straight 40 weight on a cold morning. No more stirring or bubbles will be trapped and I don't think the pigments will settle at this point.

    Now, I just let it sit. 72 hours at a minimum which would be Weds., but I won't have time to get back to it until Thursday, so that's all the better. It is 69" long and 19" wide. I have a friend who happens to have a 20" planer, so I'll have to let him know I will be ready for that step in a few days.

    I had a couple of areas where the epoxy seeped over and under the caulk "dams", and I added "backup dams" but I haven't had any breakthroughs since yesterday late afternoon, so I think I'm good now.

    View attachment 154654 View attachment 154655
    Can't wait to see the final product Hough!! Looks great!
     
    Top Bottom