All Things Woodworking

The #1 community for Gun Owners in Indiana

Member Benefits:

  • Fewer Ads!
  • Discuss all aspects of firearm ownership
  • Discuss anti-gun legislation
  • Buy, sell, and trade in the classified section
  • Chat with Local gun shops, ranges, trainers & other businesses
  • Discover free outdoor shooting areas
  • View up to date on firearm-related events
  • Share photos & video with other members
  • ...and so much more!
  • Drewski

    Master
    Rating - 0%
    0   0   0
    Sep 4, 2019
    1,686
    113
    Deep South Side
    I'm about 14 hours post pour. Up until I went to bed last night, I checked the temperature and slowly stirred the epoxy to keep the pigments suspended every 45 minutes. Then I got up once overnight at 2:30a to do the same.

    With a room temperature of about 70-72 degrees, when I went to bed, the epoxy was close to 80. In the middle of the night, it was in the mid-80s. It is about 90 degrees this morning which is perfect. I'm pretty sure that there will be no runaway exothermic reaction at this point, just a nice, slow warming.

    I stirred one more time this morning and the epoxy is pretty thick now. It was just a bit thicker than water when I poured, think 5w30 at room temp. Now it's like straight 40 weight on a cold morning. No more stirring or bubbles will be trapped and I don't think the pigments will settle at this point.

    Now, I just let it sit. 72 hours at a minimum which would be Weds., but I won't have time to get back to it until Thursday, so that's all the better. It is 69" long and 19" wide. I have a friend who happens to have a 20" planer, so I'll have to let him know I will be ready for that step in a few days.

    I had a couple of areas where the epoxy seeped over and under the caulk "dams", and I added "backup dams" but I haven't had any breakthroughs since yesterday late afternoon, so I think I'm good now.

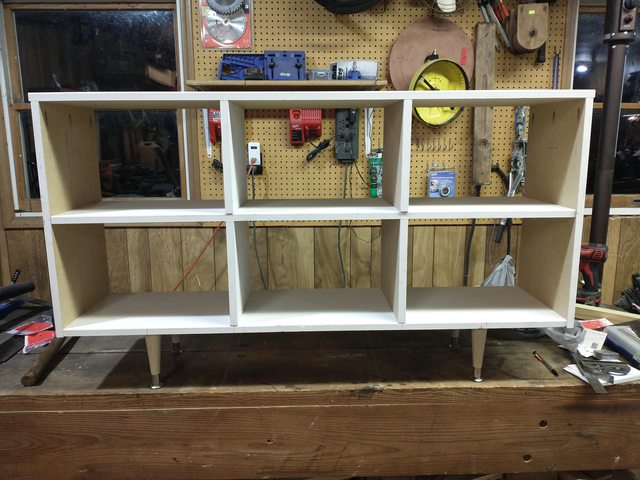
    View attachment 154654 View attachment 154655
    You did that in a single pour? I’ve considered doing one at some future point, but I figured I would do it in layers. Not a priority right now. I’ve done a powder room vanity top and about 50 sq ft of kitchen countertops in a fake marble look: base coat, pattern coat, and one or two clear coats on top. My next epoxy projects will be some accent pieces and a bartop.

    219FA413-A65A-47BE-BFD6-7F84F0BDCF85.jpeg

    F290D52C-977D-4AC3-B035-9D42085E6CC9.jpeg
     

    HoughMade

    Grandmaster
    Rating - 0%
    0   0   0
    Oct 24, 2012
    35,768
    149
    Valparaiso
    You did that in a single pour? I’ve considered doing one at some future point, but I figured I would do it in layers. Not a priority right now. I’ve done a powder room vanity top and about 50 sq ft of kitchen countertops in a fake marble look: base coat, pattern coat, and one or two clear coats on top. My next epoxy projects will be some accent pieces and a bartop.

    View attachment 154666

    View attachment 154667
    They look great!

    I did it in a single pour using "deep pour" epoxy which can be poured over 2 inches deep in a single pour. This is 1 5/8" deep. Since it is in an air conditioned room and I have good control of the temperature, I am not worried. In fact, I had to add a space heater to keep the room at 70 degrees. It is the basement furthest from the thermostat and closest to the air handler. I have read some information that indicates that having the epoxy at different stages of cure can add to cupping, so I wanted to avoid that. I used "table top" epoxy on another project that could be poured 1/4" and I used several layers for that, but that was filling cracks and voids in a slab rather than a large epoxy deep pour like a "river".

    When I say "one pour", it was essentially 1 pour because I mixed up 6 quarts (2 activator and 4 base), that filled it up about 2/3s. Then I mixed up 3 quarts, which filled it to within 1/8" of the top, then I mixed up 1 more quart which overfilled slightly, which is what I was looking for. All of those were mixed and pour in maybe a little over 30 minutes. Given how slow this cures, that is essentially 1 pour.
     

    Drewski

    Master
    Rating - 0%
    0   0   0
    Sep 4, 2019
    1,686
    113
    Deep South Side
    They look great!

    I did it in a single pour using "deep pour" epoxy which can be poured over 2 inches deep in a single pour. This is 1 5/8" deep. Since it is in an air conditioned room and I have good control of the temperature, I am not worried. In fact, I had to add a space heater to keep the room at 70 degrees. It is the basement furthest from the thermostat and closest to the air handler. I have read some information that indicates that having the epoxy at different stages of cure can add to cupping, so I wanted to avoid that. I used "table top" epoxy on another project that could be poured 1/4" and I used several layers for that, but that was filling cracks and voids in a slab rather than a large epoxy deep pour like a "river".

    When I say "one pour", it was essentially 1 pour because I mixed up 6 quarts (2 activator and 4 base), that filled it up about 2/3s. Then I mixed up 3 quarts, which filled it to within 1/8" of the top, then I mixed up 1 more quart which overfilled slightly, which is what I was looking for. All of those were mixed and pour in maybe a little over 30 minutes. Given how slow this cures, that is essentially 1 pour.
    Interesting. What's your source for the epoxy? I've purchased from Stonecoatcountertops.com since their online videos have been so helpful. To get back on the "woodworking" angle here, all the countertops I made were out of plain ol' 3/4" MDF, with 3" wide strips of 1/2" MDF reinforcing the perimeter to get the thickness back up to standard 1 1/4". So easy. Just glue the heck out of the strips and flush-trim rout the face and 1/8" roundover the corner. Done! The epoxy does so well filling in any voids that the miter (butt, actually) on the 90 degree piece is completely covered and it looks like it was cut out of a single piece. Total project (time notwithstanding) maybe cost $600 including the biscuit joiner I "had to" buy. Hey any excuse for a new tool, amirite? I recommend the project to anyone with some reasonable handy skills.

    IMG_2613.jpg

    IMG_2593.jpg


    HoughMade

    Grandmaster
    Rating - 0%
    0   0   0
    Oct 24, 2012
    35,768
    149
    Valparaiso
    Interesting. What's your source for the epoxy? I've purchased from Stonecoatcountertops.com since their online videos have been so helpful. To get back on the "woodworking" angle here, all the countertops I made were out of plain ol' 3/4" MDF, with 3" wide strips of 1/2" MDF reinforcing the perimeter to get the thickness back up to standard 1 1/4". So easy. Just glue the heck out of the strips and flush-trim rout the face and 1/8" roundover the corner. Done! The epoxy does so well filling in any voids that the miter (butt, actually) on the 90 degree piece is completely covered and it looks like it was cut out of a single piece. Total project (time notwithstanding) maybe cost $600 including the biscuit joiner I "had to" buy. Hey any excuse for a new tool, amirite? I recommend the project to anyone with some reasonable handy skills.

    View attachment 154675

    View attachment 154676


    "Liquid Glass" Deep Pour on Amazon.

    It is used by this guy:


    HoughMade

    Grandmaster
    Rating - 0%
    0   0   0
    Oct 24, 2012
    35,768
    149
    Valparaiso
    This morning, about 36 hours in, the epoxy is very hard with just the very slightest "give". That is great given that this is only half-way through the recommended cure time of 72 hours. When I checked it last night after work, there were 2 very small bubbles that had formed and with the epoxy pretty well set by then, they will there until the finishing process. One bubble is the size of the tip of a ball-point pen. The other is about 3/32". They are right on the surface and may disappear with the surfacing process. In any event, if they remain after that, they will be tiny and easily filled with pigmented 5 minute epoxy which should make them disappear.

    Interestingly, the epoxy never got above about 93 degrees. It is room temperature now. I had read that if it stayed under 120 degrees, it would be fine. I have even seen some say that it should be OK to over 150 degrees. Not even close. I don't know what environment those guys are pouring in or how thick....but something seems off about those numbers based upon my experience. The problem with too high a temperature is that it can cure too quickly, shrink and crack. If the temperature stays lower, it cures slower and shrinks less.
     
    Last edited:

    Drewski

    Master
    Rating - 0%
    0   0   0
    Sep 4, 2019
    1,686
    113
    Deep South Side
    This morning, about 36 hours in, the epoxy is very hard with just the very slightest "give". That is great given that this is only half-way through the recommended cure time of 72 hours. When I checked it last night after work, there were 2 very small bubbles that had formed and with the epoxy pretty well set by then, they will there until the finishing process. One bubble is the size of the tip of a ball-point pen. The other is about 3/32". They are right on the surface and may disappear with the surfacing process. In any event, if they remain after that, they will be tiny and easily filled with pigmented 5 minute epoxy which should make them disappear.

    Interestingly, the epoxy never got above about 93 degrees. It is room temperature now. I had read that if it stayed under 120 degrees, it would be fine. I have even seen some say that it should be OK to over 10 degrees. Not even close. I don't know what environment those guys are pouring in or how thick....but something seems off about those numbers based upon my experience. The problem with too high a temperature is that it can cure too quickly, shrink and crack. If the temperature stays lower, it cures slower and shrinks less.
    I wasn't quite that precise with the temps as you. One of my countertop pieces, the island, cured differently from the others and I don't know why. The ratio was simple (1:1) and the temp / humidity was very consistent in the basement. I did have a space heater running the entire time as I didn't want too much air blowing around and settling dust into the epoxy. This particular piece is still "soft" so to speak. Glass dishes will stick to it if they sit a while, and heavy items will make a slight impression if they sit a while, but the surface will heal after a bit and any slight impression disappears. Not sure what a good fix would be, other than to try another coat of clear. The other pieces are fine.

    IMG_2420.jpg

    This piece is fine. Same size, same epoxy mix. ¯\_( ツ)_/¯

    IMG_2419.jpg
     
    Last edited:

    HoughMade

    Grandmaster
    Rating - 0%
    0   0   0
    Oct 24, 2012
    35,768
    149
    Valparaiso
    I wasn't quite that precise with the temps as you. One of my countertop pieces, the island, cured differently from the others and I don't know why. The ratio was simple (1:1) and the temp / humidity was very consistent in the basement. I did have a space heater running the entire time as I didn't want too much air blowing around and settling dust into the epoxy. This particular piece is still "soft" so to speak. Glass dishes will stick to it if they sit a while, and heavy items will make a slight impression if they sit a while, but the surface will heal after a bit and any slight impression disappears. Not sure what a good fix would be, other than to try another coat of clear. The other pieces are fine.

    View attachment 154826

    This piece is fine. Same size, same epoxy mix. ¯\_( ツ)_/¯

    View attachment 154827
    Crazy. They look good though. Is it uniformly "soft"?
     

    Drewski

    Master
    Rating - 0%
    0   0   0
    Sep 4, 2019
    1,686
    113
    Deep South Side
    Crazy. They look good though. Is it uniformly "soft"?
    Of course "soft" is relative. You can't simply push on it to make a mark. But I have a heavy glass fruit bowl with 6 little pads on the bottom, and after a couple days, it will leave 6 perfect little indentations in the epoxy. Remove the weight though, and the indentations eventually disappear - maybe in a day or two. Any ideas on how to get it to firm up, or should I just pour another clear coat? I'm wondering now if one of the layers wasn't completely cured before I put another one on top.
     

    HoughMade

    Grandmaster
    Rating - 0%
    0   0   0
    Oct 24, 2012
    35,768
    149
    Valparaiso
    Of course "soft" is relative. You can't simply push on it to make a mark. But I have a heavy glass fruit bowl with 6 little pads on the bottom, and after a couple days, it will leave 6 perfect little indentations in the epoxy. Remove the weight though, and the indentations eventually disappear - maybe in a day or two. Any ideas on how to get it to firm up, or should I just pour another clear coat? I'm wondering now if one of the layers wasn't completely cured before I put another one on top.
    I have no idea. It sounds like you are right, though. The current top layer sounds hard, but something underneath still have give. I'm not sure if additional layers would eliminate that or whether it would continue no matter how many layers. I don't guess it would be a problem to try another layer.
     

    HoughMade

    Grandmaster
    Rating - 0%
    0   0   0
    Oct 24, 2012
    35,768
    149
    Valparaiso
    I took the tabletop out of the mold today. That is 6 days. It only needed 3, but other things took precedence.

    It didn't stick to anything. I made the mold out of melamine and used mold release. I had a friend with a 20" planer lined up, but as it turns out, quality time with the belt sander is all it needed to get it level.

    The epoxy was poured above the level of the slabs, that's what the caulk dams were for, but shrunk as it cured until it was about 1/16th below the top of the slabs. It was slow going with the belt sander with 40 grit, but I got it leveled and it looks good.

    After the 40 grit belts, I used 60 and 80 grit belts, but with the 40 doing the stock removal all those belts had to do was remove the scratches of the grit before.

    At 80 grit, I switched to 80 grit on the random orbit and used that on top and bottom, then 100 grit and 120 grit. There were 3 air bubbles (not 2), and I filled them with 5 minute epoxy colored with the same pigments I used for the pour. I will always be able to tell where they are, but probably no one else will.

    After 120 grit, I cut the sides and ends to length. The back (wall) side is a straight cut, but both ends and the front are beveled under 5 degrees. That's where it stands now. Tomorrow after church (purely recreationally) I will hit it with 150, 180, 220, 320 and 400. The bottom will only go to 220...which would likely be enough for the top.

    I will probably then let it sit inside for day before I finish it, given the humidity where it is sitting now in the garage. I have a climate controlled project room, but no sanding in the house. Finishing yes, sanding no.

    266276C9-2088-4295-91C2-5331ED50634F.jpeg 787E52C9-E792-45B3-B179-323FE5D12A48.jpeg
     

    HoughMade

    Grandmaster
    Rating - 0%
    0   0   0
    Oct 24, 2012
    35,768
    149
    Valparaiso
    I am not displeased with the result.

    The media console table is, at long last, finished. That was a lot of sanding...then more sanding...then more sanding...and then wet sanding. I should have gotten a picture with the "fireplace" on. I greatly enjoyed learning all about pouring epoxy for the "river" section.

    EA0A3419-EFDE-4A4E-9D6F-8C86068122BE.jpeg 31D9CCF0-7955-4DC4-BD21-394761822ACF.jpeg BFA29C4B-E47B-49F7-9EA9-27186E2D218B.jpeg 82DA20B7-90E2-41A9-A32B-EE0157DC5C00.jpeg
     

    B40B

    Marksman
    Rating - 100%
    1   0   0
    Oct 29, 2020
    256
    43
    Valparaiso
    I am not displeased with the result.

    The media console table is, at long last, finished. That was a lot of sanding...then more sanding...then more sanding...and then wet sanding. I should have gotten a picture with the "fireplace" on. I greatly enjoyed learning all about pouring epoxy for the "river" section.

    View attachment 156446 View attachment 156448 View attachment 156449 View attachment 156450
    Looks fantastic!

    Question is, would you do another epoxy project or are you one and done?
     

    ghuns

    Grandmaster
    Rating - 100%
    2   0   0
    Nov 22, 2011
    9,340
    113
    Daughter in Virginia rearraigned her living room and had a space between the end of the sectional couch and wall that needed filled. She couldn't find anything, it's a really odd size. She wanted it to serve as an end table for the couch and have storage for the kids toys. It won't really be seen so didn't need to be fancy.

    I had her order some pre-primed 3/4"x12"x8' MDF from Lowe's up here and did a store pick up. Threw it together Friday night after dinner. It's all just screwed together with pocket screws so I can break it down and transport it in my trunk when I go out there later this week. Painting it is her problem...

    aZJvlRdl.jpg
     

    HoughMade

    Grandmaster
    Rating - 0%
    0   0   0
    Oct 24, 2012
    35,768
    149
    Valparaiso
    We are giving my mother-in-law our no-longer used 42" TV. She is upgrading from a 25" console...those things last forever. I made her a TV stand to match her furniture. The table is all cherry, well, the top is cherry veneered plywood (both sides). I cheated and bought the queen anne legs from Rockler. I bought the cherry boards off of eBay. When they advertsed 1x6, they meant a legitimate 1" by 6", so this thing is solid. I routed the trim for the edge of the top on my router table. I bought this router for about $70 almost 20 years ago. It is a Skil- inexpensive brand, but it's 2hp. It works great as long as I use quality bits. Turned out well, if I do say so myself.
    4E5A38AB-D9AA-4FCA-A0DE-0F13458D3295.jpeg 0BBC4815-CA42-4EC7-A3C1-99B852AA18C1.jpeg
     
    Last edited:

    ghuns

    Grandmaster
    Rating - 100%
    2   0   0
    Nov 22, 2011
    9,340
    113
    ...I cheated and bought the queen anne legs from Rockler...
    Oh man, you missed out on the most funnest part.

    I made a pair of footstools for the in laws a long time ago with Queen Anne legs on a s**tty Craftsman table top band saw. Getting them to look right is harder than actually cutting them out.
     

    HoughMade

    Grandmaster
    Rating - 0%
    0   0   0
    Oct 24, 2012
    35,768
    149
    Valparaiso
    Oh man, you missed out on the most funnest part.

    I made a pair of footstools for the in laws a long time ago with Queen Anne legs on a s**tty Craftsman table top band saw. Getting them to look right is harder than actually cutting them out.
    I have a 12" bandsaw...but I was under a time crunch. Just getting a cherry 2x2 would have pushed the limit, let alone the shaping.

    However, my wife is now a little jealous of her Mom's table and a coffee table for our library/sitting room is on the list. I'll probably give it a try.
     
    Top Bottom