

I posted this on a couple of other forums, thought someone here may find it useful.
I am going to start out this review with a couple of disclaimers.
First, this is not intended to be a “what’s best” declaration. This is quite simply an explanation of what I have found to work best for me and why. There are other quality options on the market and I am not here to knock any of them. Personal preference plays a huge roll in gear selection, what you will find here is my preference. Please take from it what you will and don’t read anything more into it than what you see here.
Second, I fully realize and understand the problems that have been encountered in obtaining some of these products. Some of the products depicted here are in high demand and difficult to get ahold of. I waited some time to obtain some of them and have found that it was worth the wait. Everything I will discuss is available through Phoenix Tactical and I recommend going through Phoenix Tactical exclusively to obtain them.
Lastly, I am not affiliated with Phoenix Tactical or Alamo Four Star in any manner other than being a very satisfied consumer of their products. I am not being paid or reimbursed in any way for this review. Scott Hansen at Phoenix Tactical has been nothing but professional and courteous in my dealings with him. My primary motivation for posting this review is to share what has made my job easier, if Phoenix Tactical receives business as a result I feel it is well deserved.
Now that all that is out of the way,
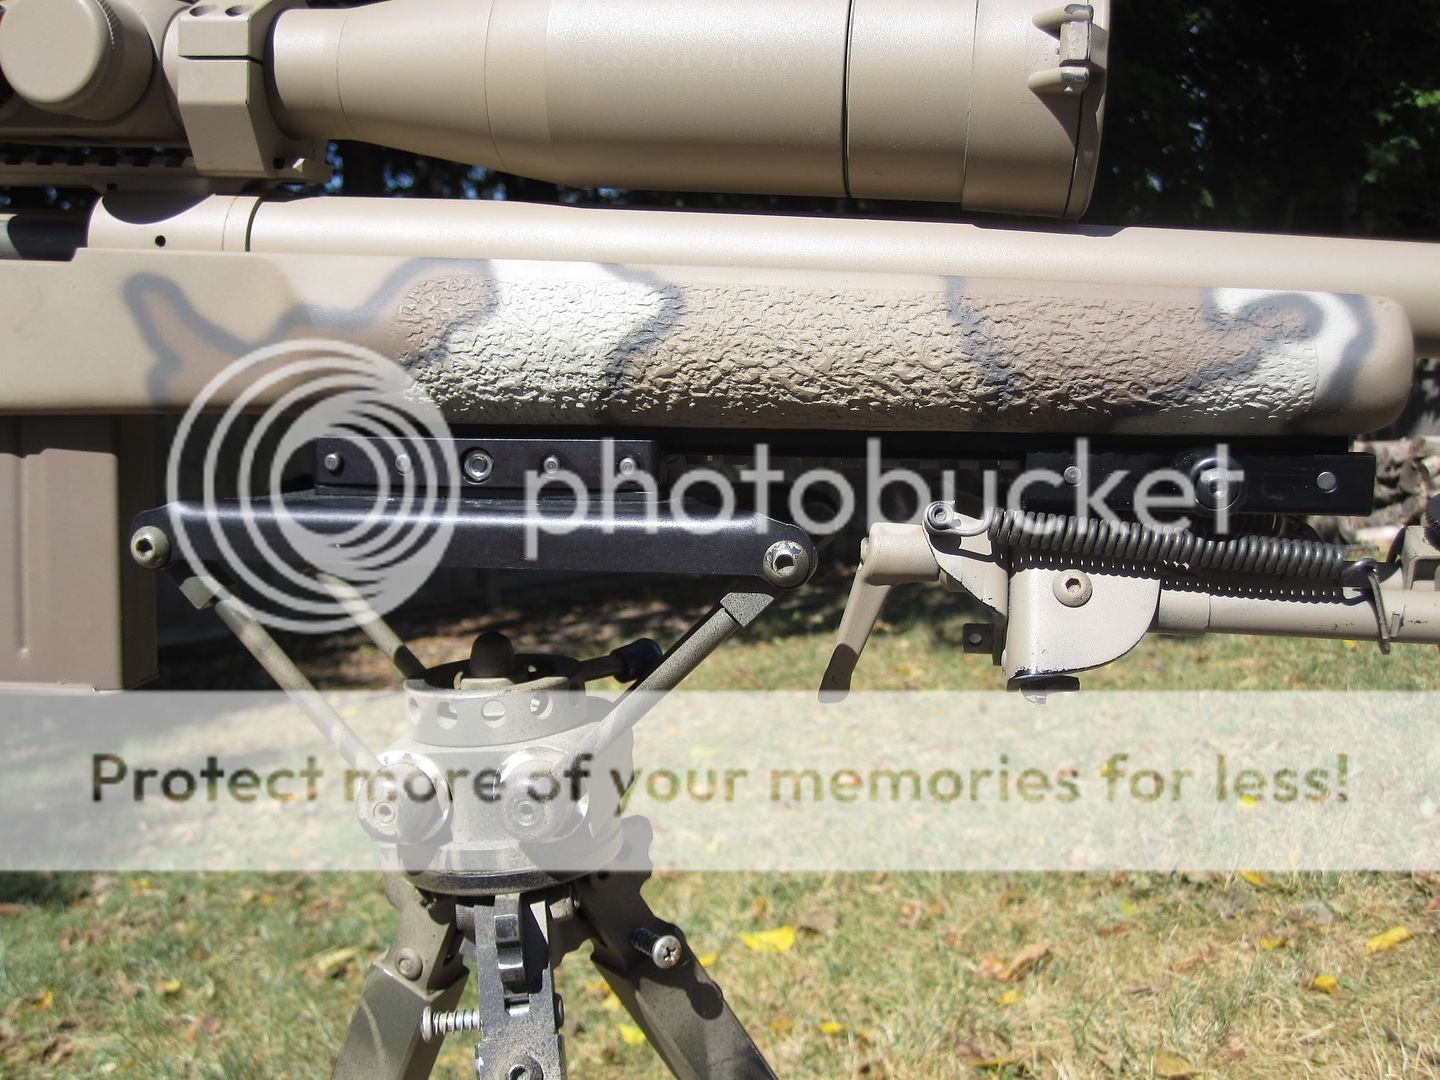
I decided to make some changes to increase the versatility of my setup. I use my rifle in a wide variety of situations from the flat range to office building roof tops to “urban hides” set up in apartment buildings and houses. I’ve been using a DCLW tripod with side pressure kit for a couple of years with great success but have felt it would perform better if I could lock the rifle in more securely. I ran across this thread: How To Install BT17 Rail for Atlas Bipod in McM A5 - Sniper's Hide Forums and a lightbulb came on. I ordered a 12” picatinny rail blank and put myself in line for the tools that 427Cobra was nice enough to share. Once everything arrived I went to work installing the rail to my stock. Here is the finished product:

**Many thanks to 427Cobra for the tutorial and the use of his tools for this project**
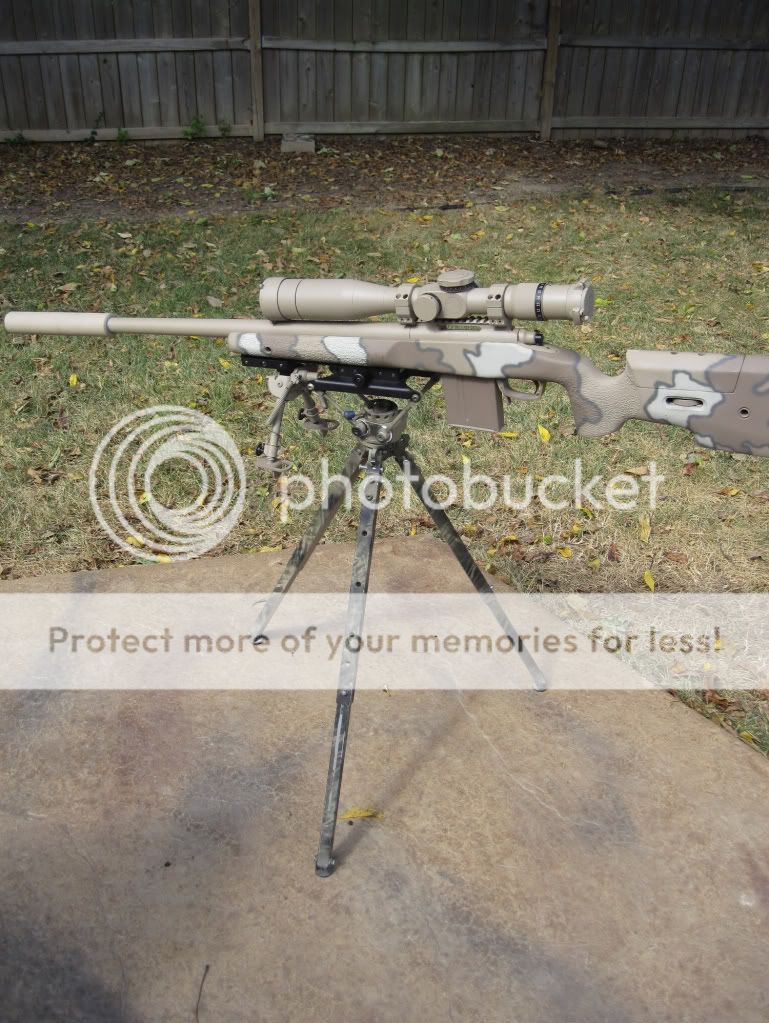
I also contacted Scott at Phoenix Tactical and ordered a DLOC-S, a flat top conversion which replaces the cradle on my DCLW with a flat top and DLOC adapter, a set of prototype “T’s” replacement legs and a set of Leg Lock Screws.
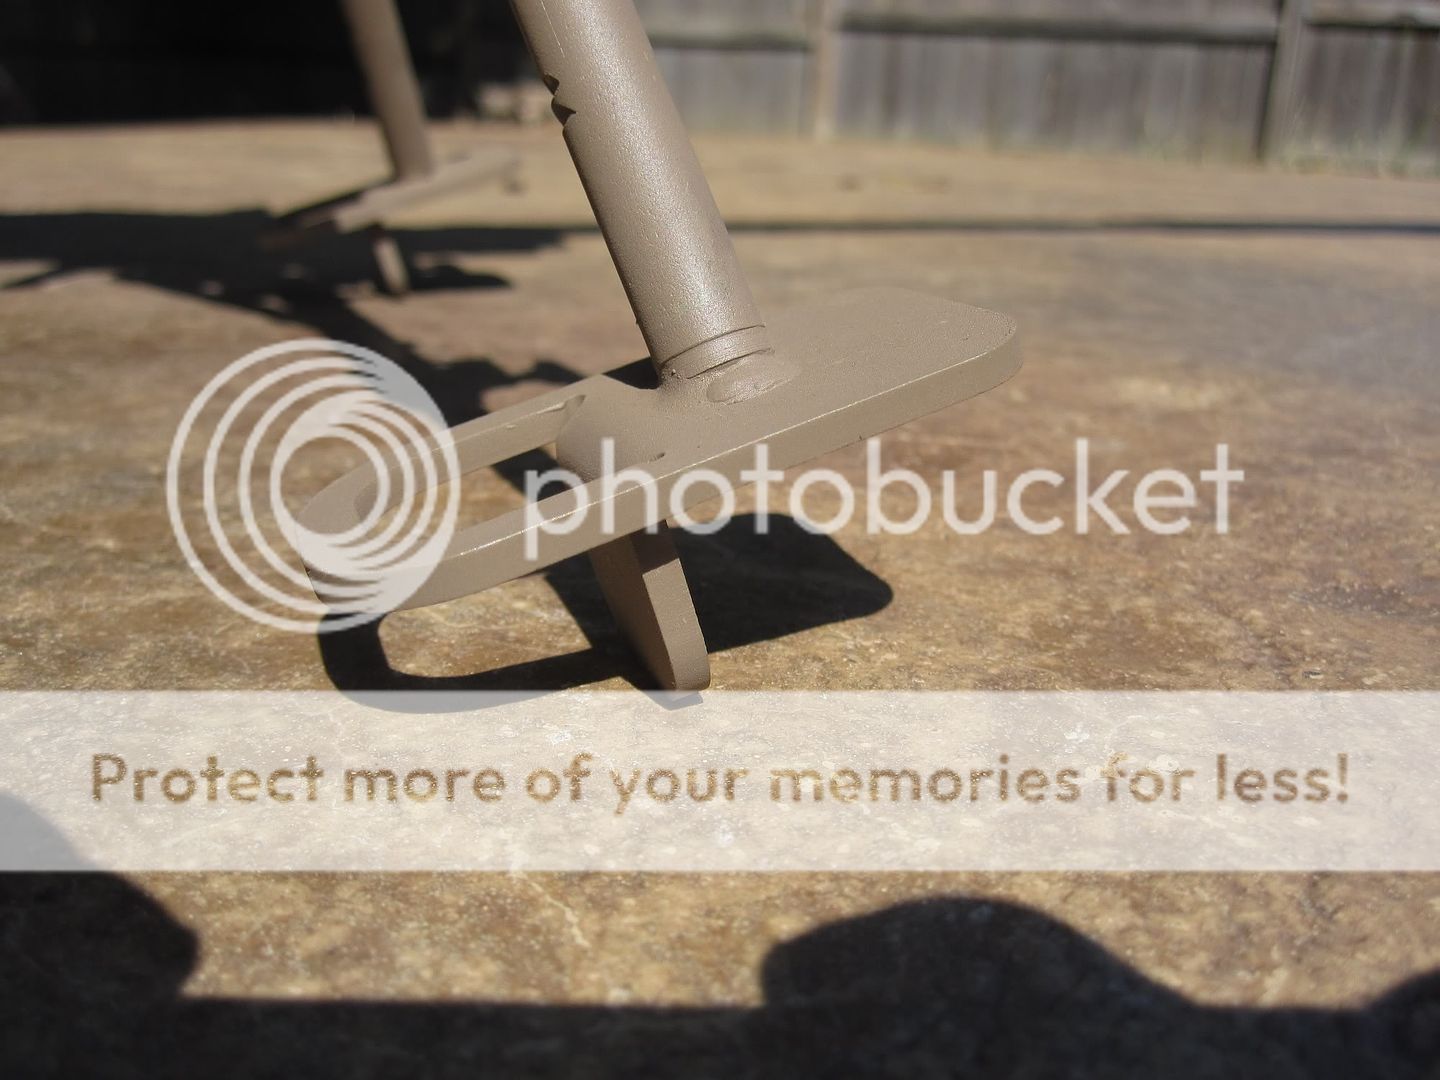
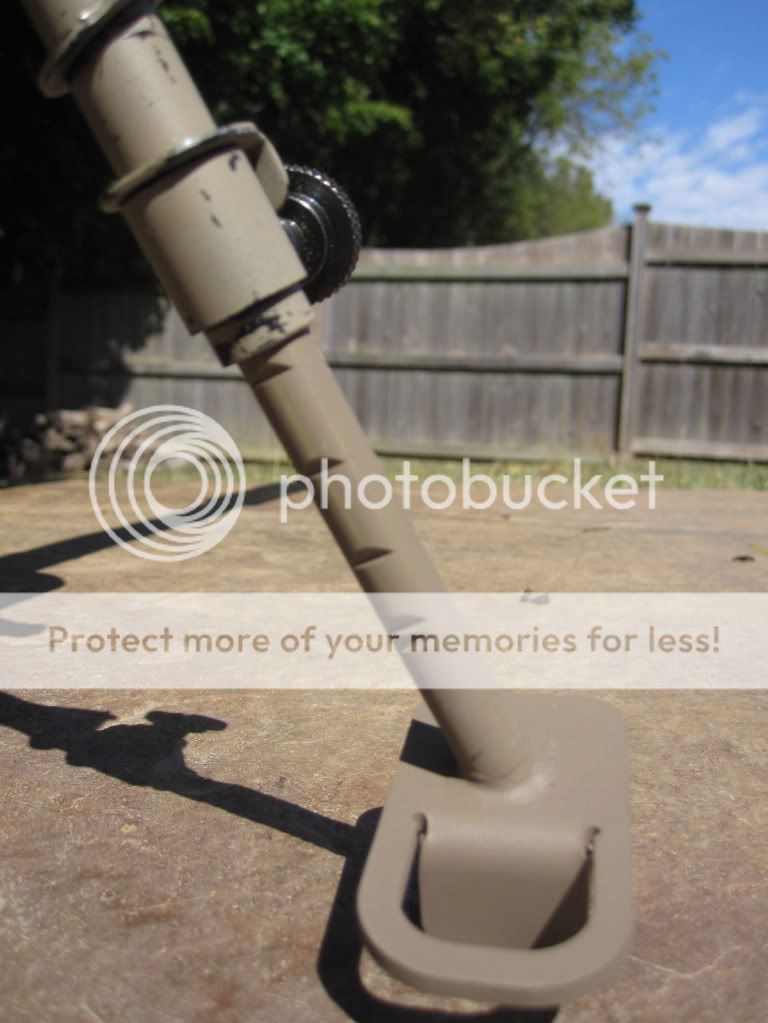
I previously owned a set of the “T’s” replacement legs and Leg Lock Screws for the Harris Bipod which I used for about a year on an Iron Ridge Arms rifle that I sold recently. I have also owned and used Phoenix Tactical’s Pod Claws. I like to shoot very low to the ground and using the DLOC-S and rail setup added some height to my bipod. The “t’s” legs reduce the overall height of the Harris 6”-9” bipod bringing the height back down where I need it.

The only complaint I had with the Pod Claws was that they wanted to grab along the interior of my Eberlestock Phantom scabbard when putting the rifle away, the aggressive claws would also chew into the wood deck at one of the shooting ranges I frequent. The “T’s” footings offer a good compromise in my opinion. They offer both a vertical and horizontal surfaces which still bite into soil and allow substantial bipod loading but also work extremely well on horizontal surfaces such as a concrete curb, the gaps in an automobile body and window sills which can be easily protected from damage by a piece of tape applied before placing the rifle. As you can see the feet on the “T’s” legs are welded to the leg for strength.
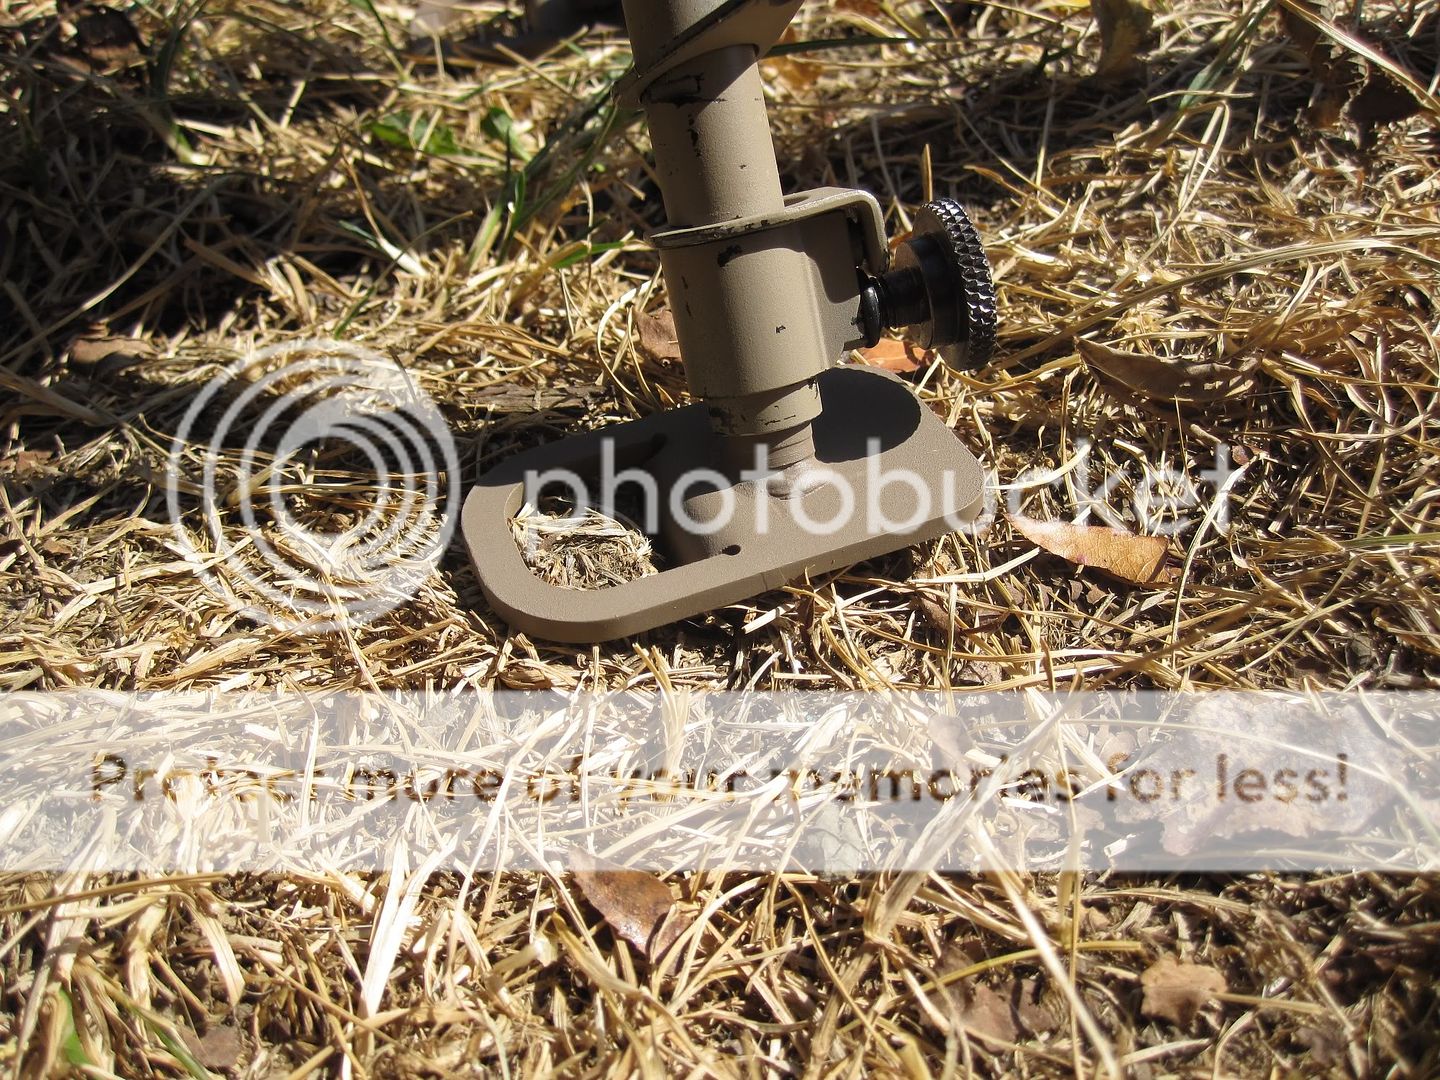


The “T’s” legs have a slot cut down the back side that, when combined with the Leg Lock screws, prevent the bipod legs from spinning within the upper legs. This help keep the rifle planted and reduces movement requiring readjusting between shots.
The “T’s” legs also have notches cut to allow the continued use of preset height adjustments available with the Harris bipod.
Phoenix Tactical plans to have the 5.5 Tactical Bipod available with the “T’s” legs available this fall.
With the modifications to my rifle stock and the bipod complete I can now attach the bipod to the rifle at any position along the rail. The bipod remains out on the end the vast majority of the time but I have found moving it toward the rear a bit makes tracking moving targets a bit easier.
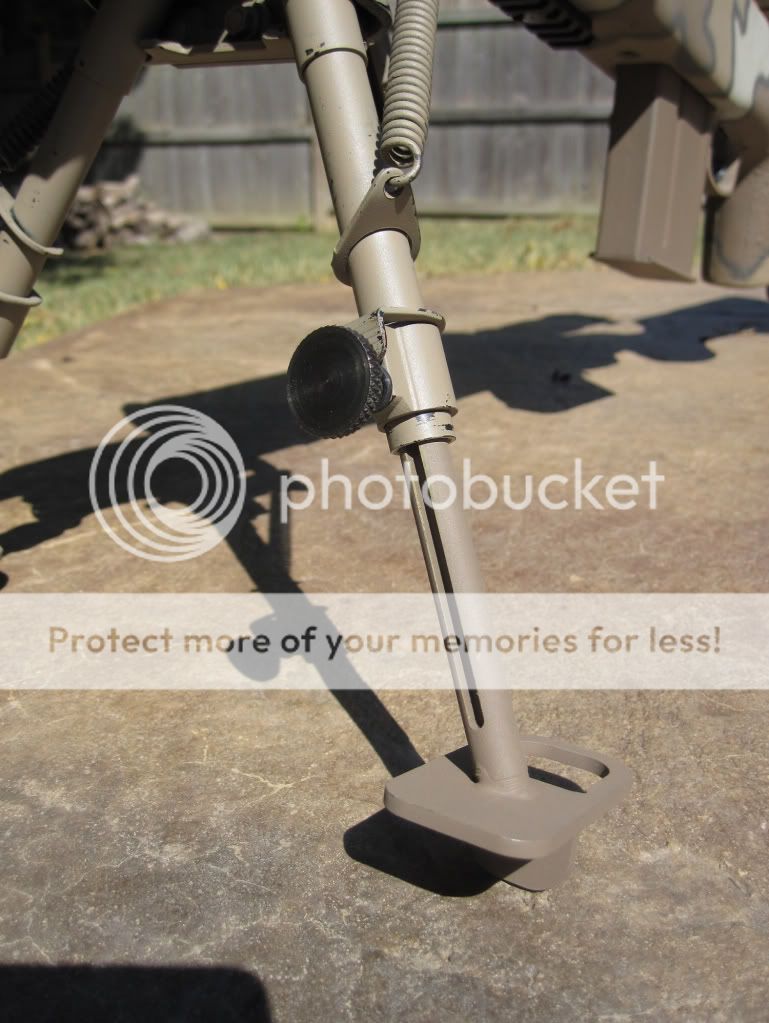
The DLOC attachment works very easily. There is a knob which is backed out until it stops.

The end of the knob is then pushed in toward the center line and the adapter opens up to grab the picatinny rail.

The knob is then released which closes the DLOC around the rail. The knob is then tightened back down which locks the adapter to the rail.

The DLOC-S still allows for the swivel feature of the Harris bipod to function and takes all of about three minutes to install.
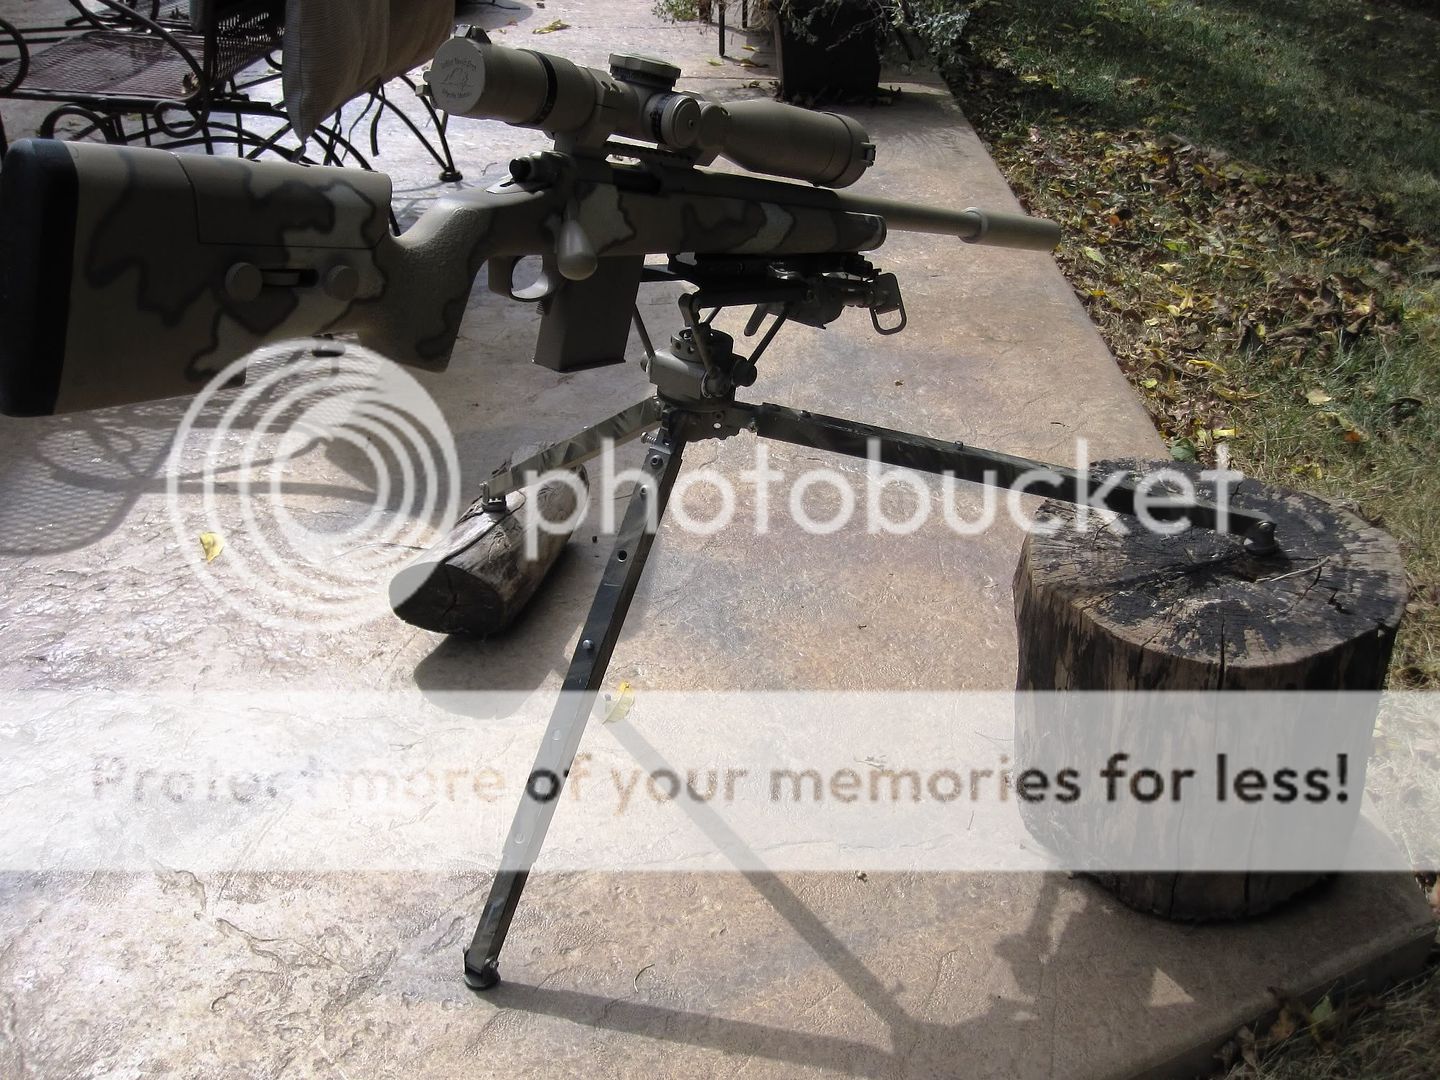
The DLOC adapter on the DCLW is pretty self explanatory at this point as it works the same as the DLOC-S but attaches the rifle to the DCLW via the rail affixed to the rifle stock. The DCLW offers a fantastic platform for shooting the rifle, tracking moving targets, adjusting for elevation or locking the rifle into position and being able to walk away if necessary.
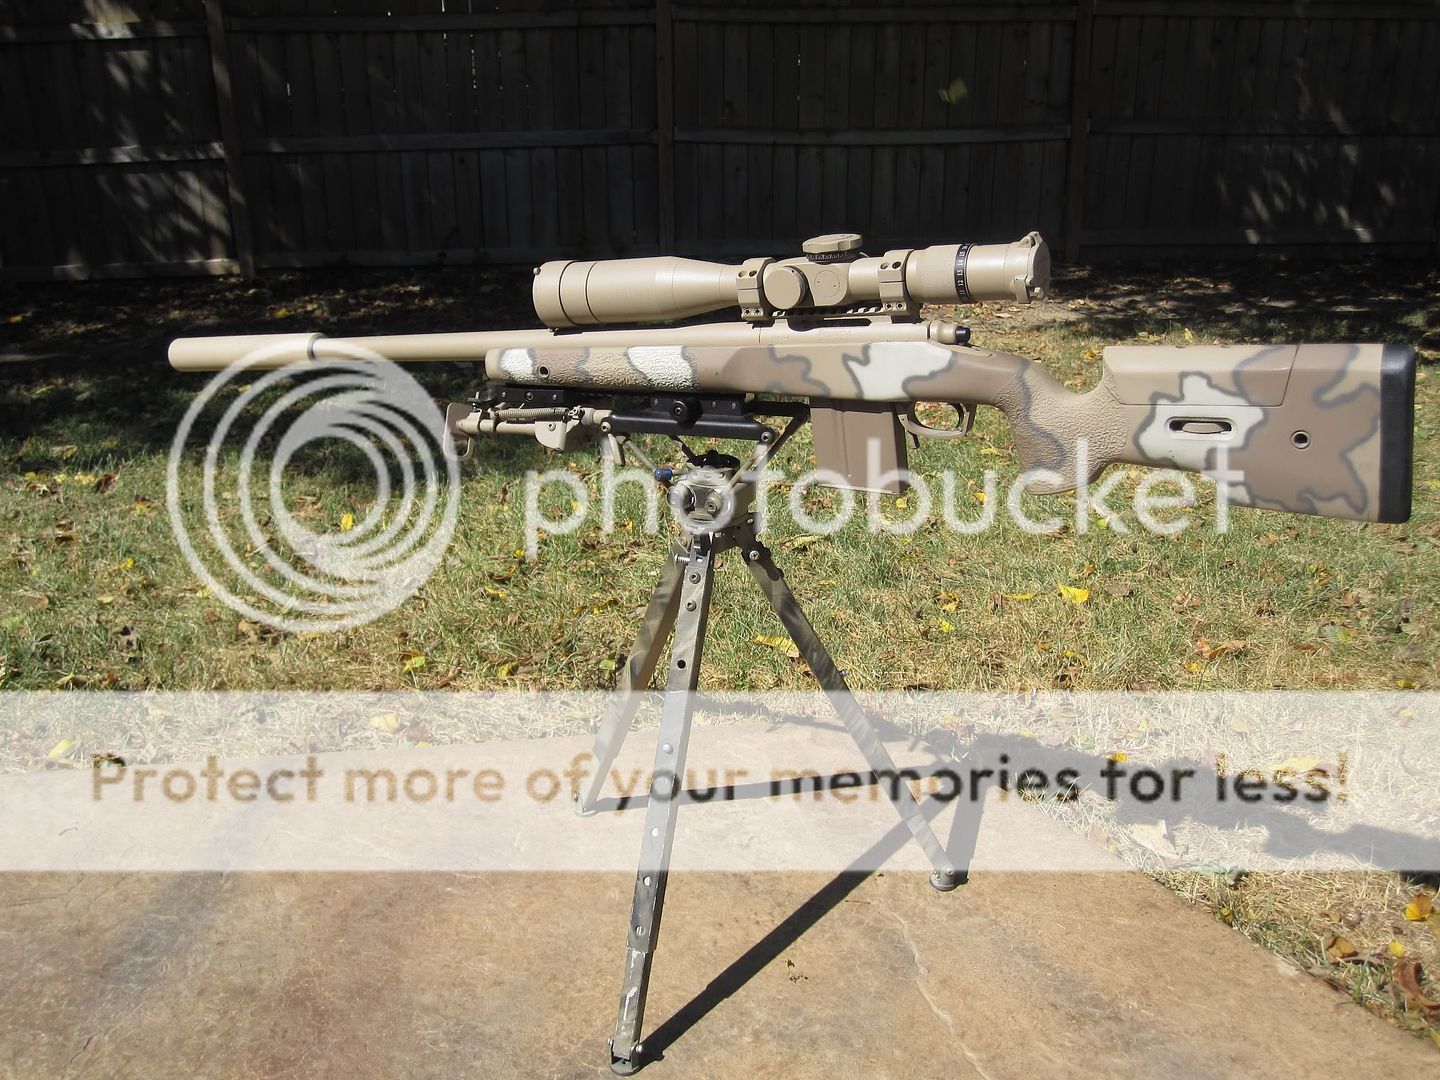
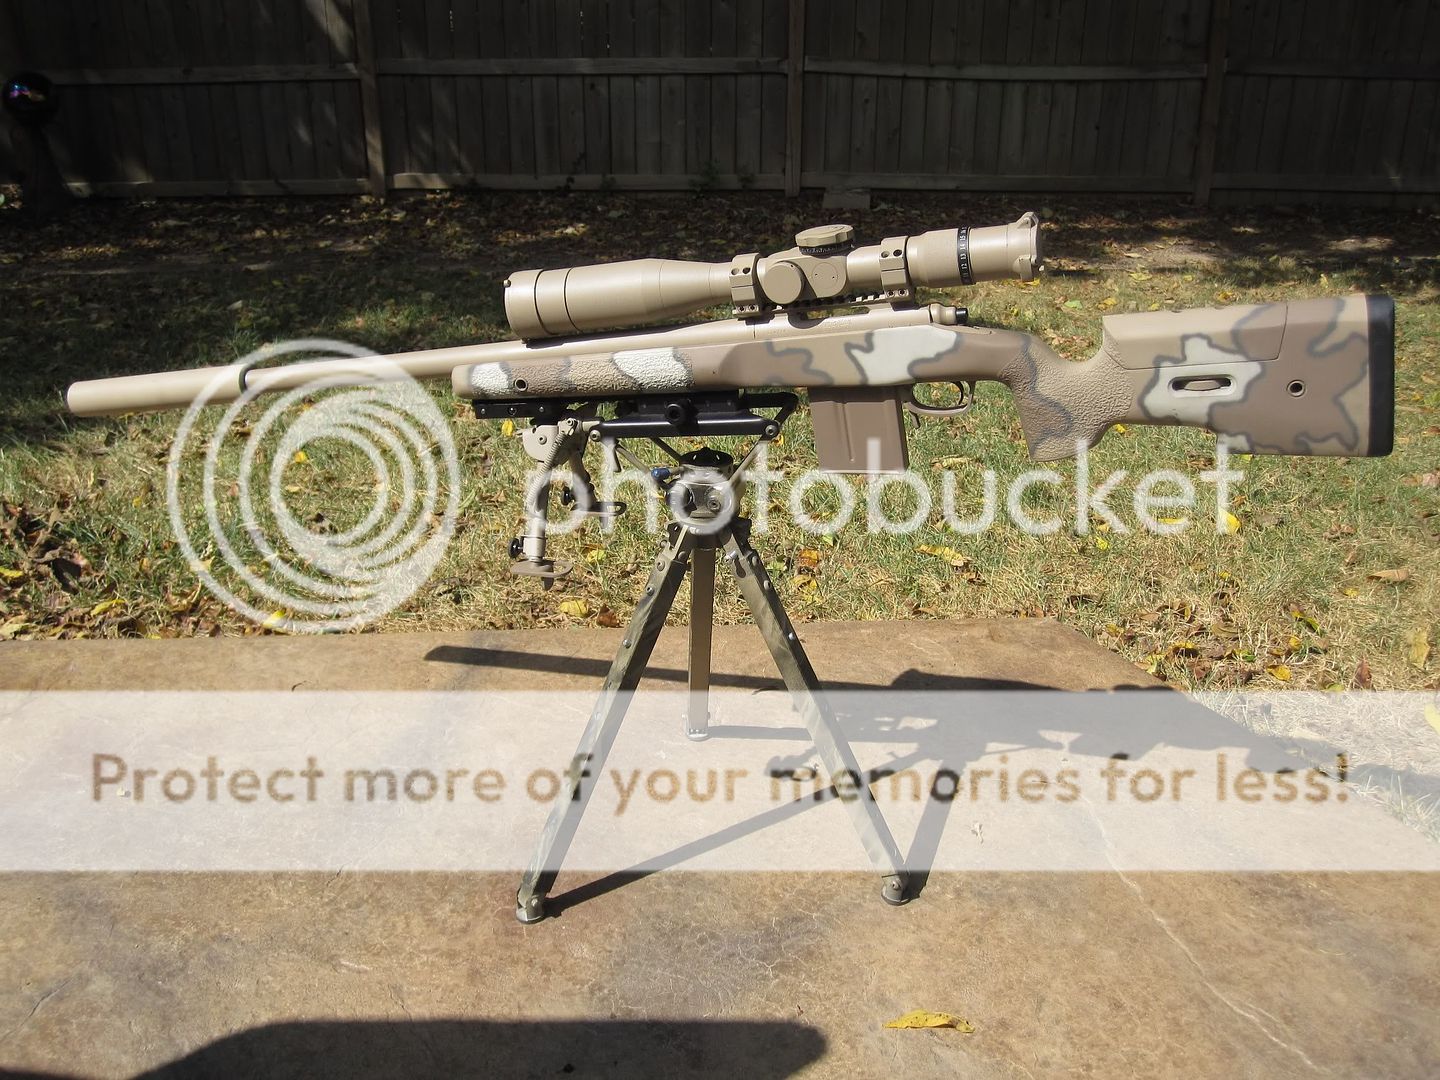

As you can see from the pics I have enough length on the rail I installed to keep the Harris bipod attached and still utilize the DCLW.
If you have a shorter rail section installed you can remove the bipod and lock the rifle into the tripod. The DCLW is strong enough to support the rifle from the end of the stock.
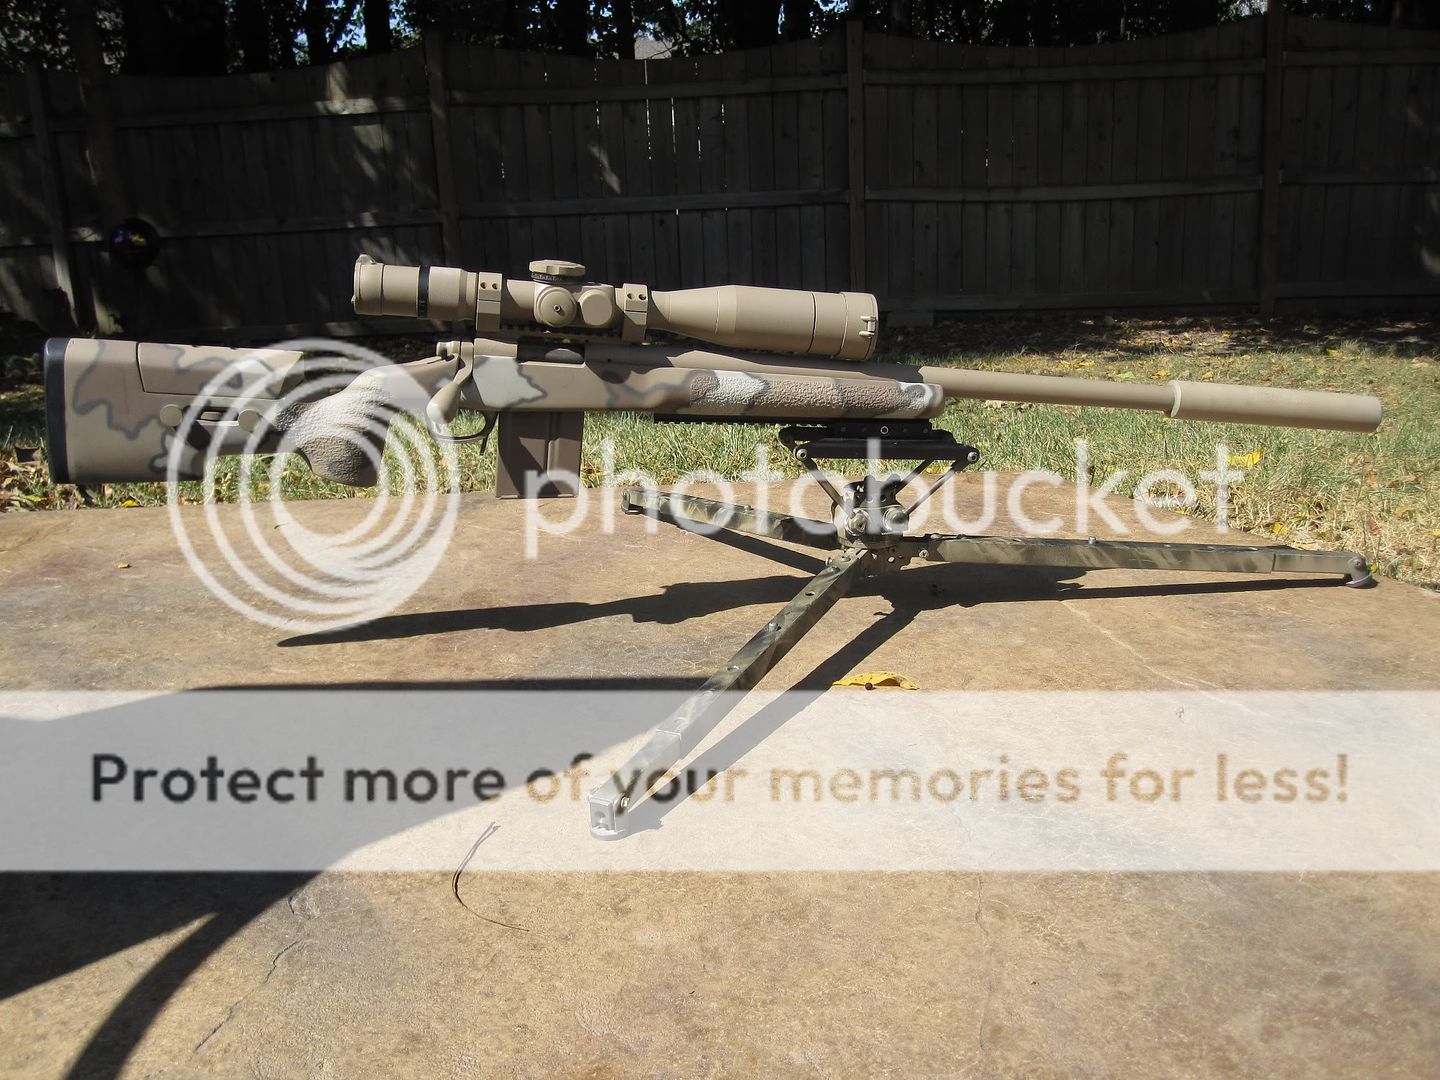
The DCLW offers four positions for spread of the legs which can be used to stabilize the tripod on uneven surfaces.
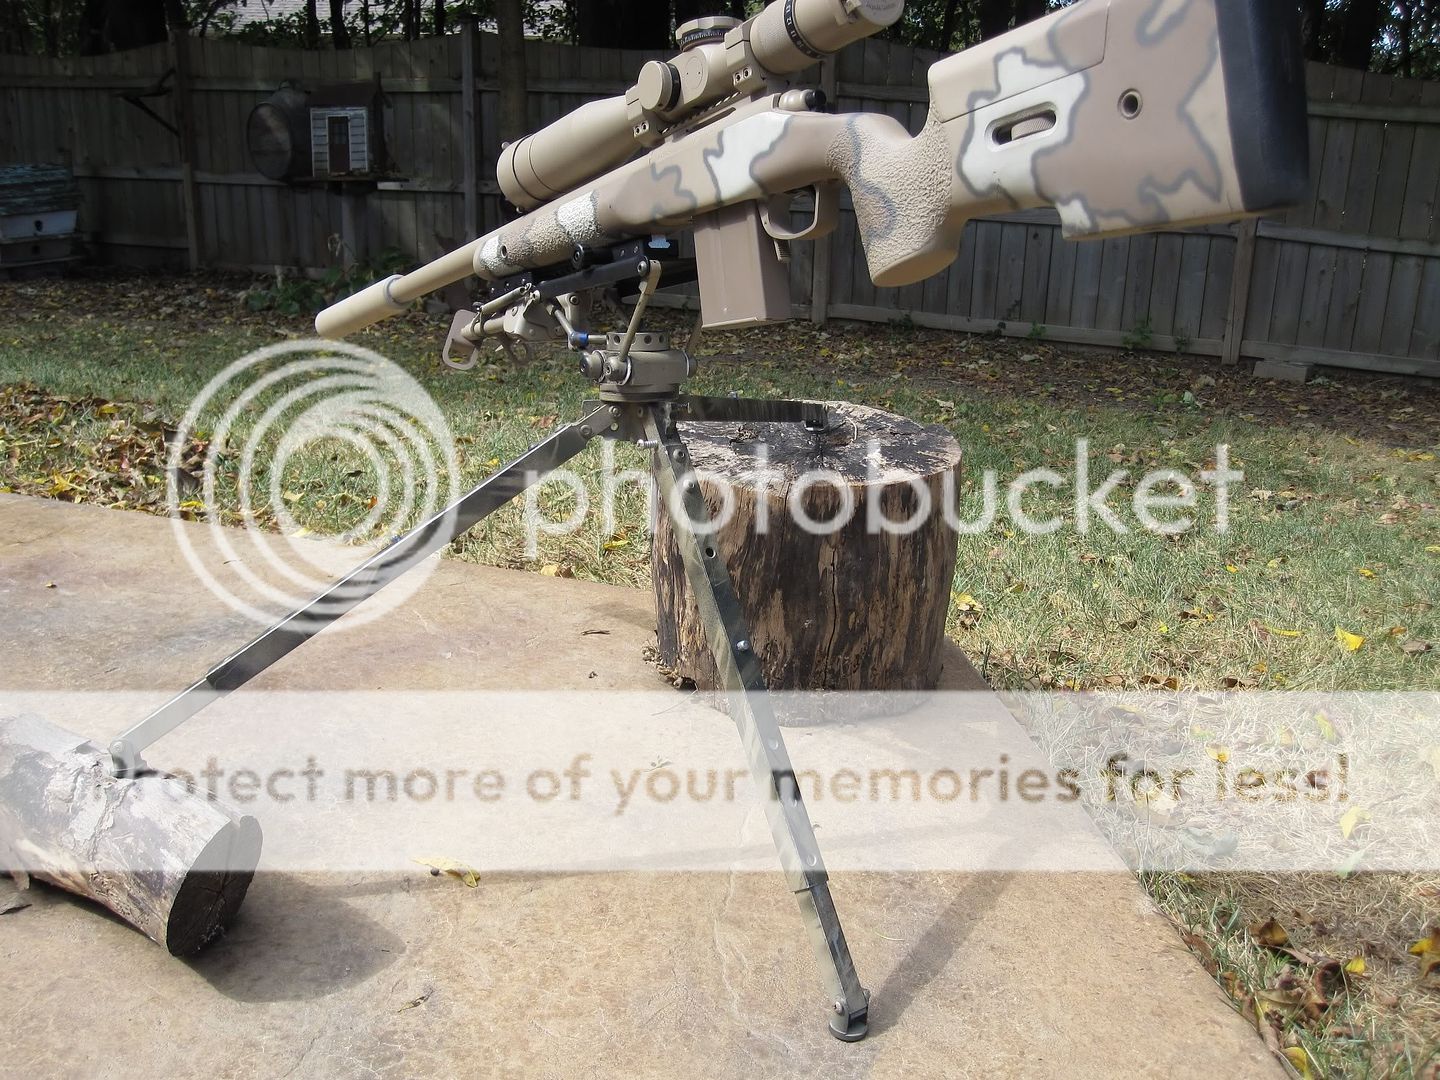
The tripod also offers five length adjustments for the legs allowing for an overall height from 19.5” up to 28” with the legs spread to the narrowest setting.
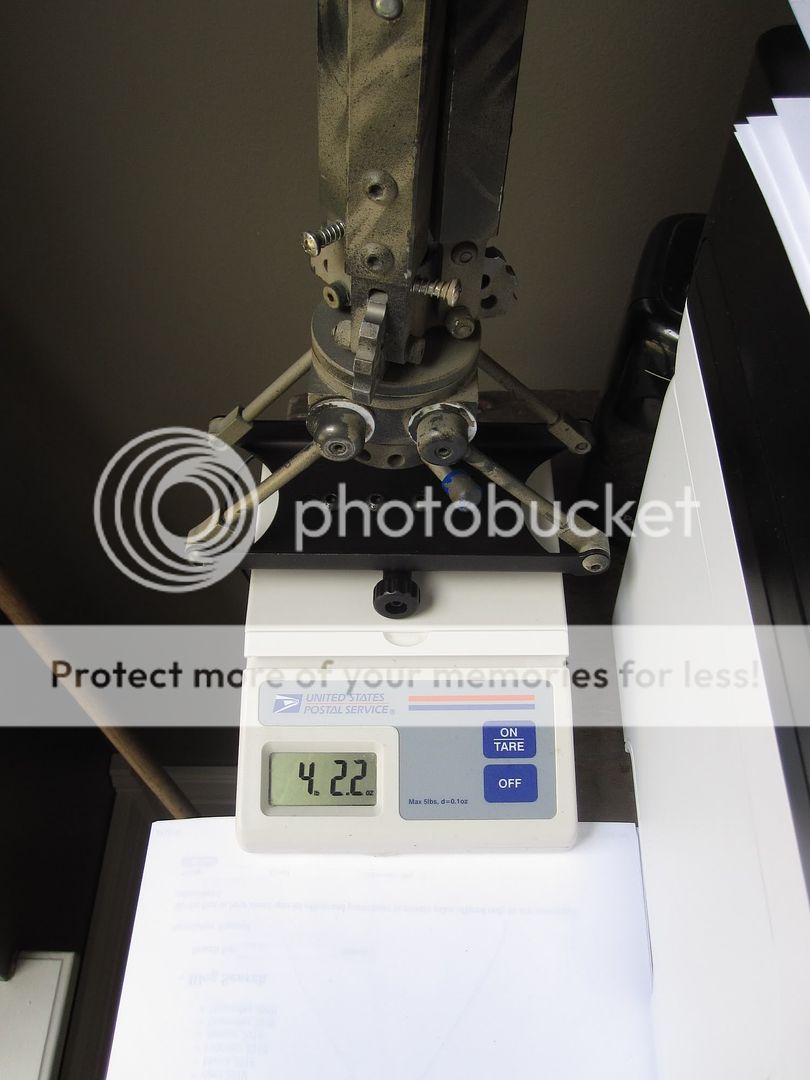
The DCLW weighs in at 4lbs 2.2oz (according to my cheap USPS scale)
The tripod folds up into a package roughly 21.5” long by 4” wide.

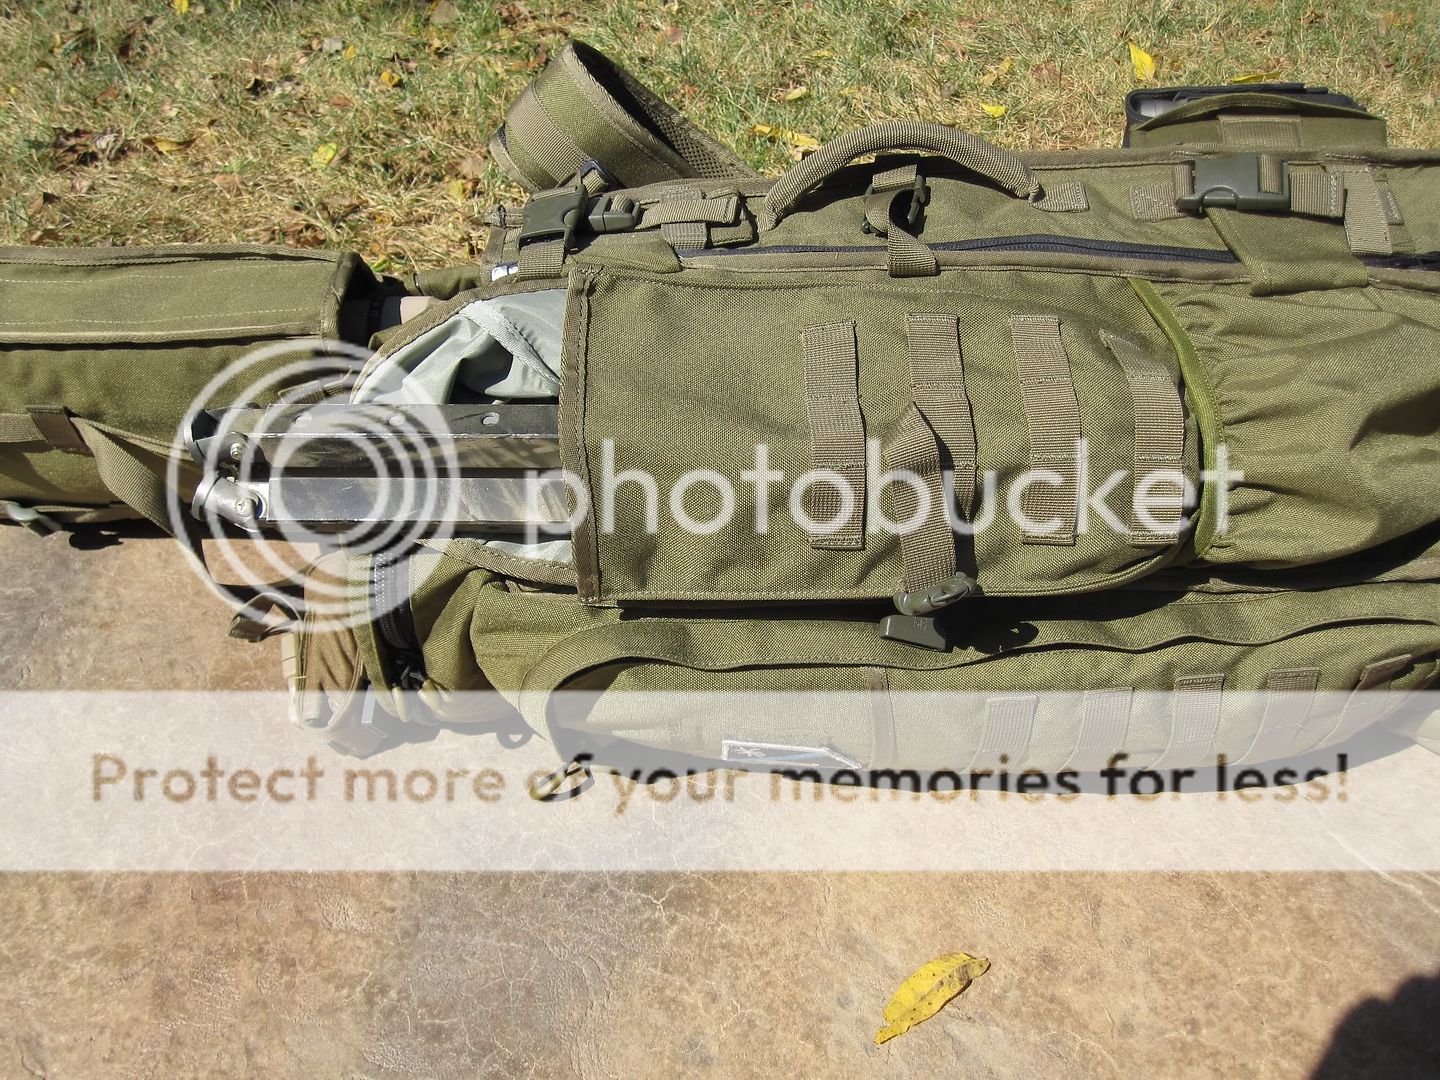
The tripod fits nicely into the side pocket of my Eberlestock Phantom pack

Hopefully this will be of some use to shooters out there looking for a quality setup that has worked well for my needs. As I stated in my disclaimers I'm not here trying to say this is the best out there or that it is any better than any other products on the market. It simply works for me.
I am going to start out this review with a couple of disclaimers.
First, this is not intended to be a “what’s best” declaration. This is quite simply an explanation of what I have found to work best for me and why. There are other quality options on the market and I am not here to knock any of them. Personal preference plays a huge roll in gear selection, what you will find here is my preference. Please take from it what you will and don’t read anything more into it than what you see here.
Second, I fully realize and understand the problems that have been encountered in obtaining some of these products. Some of the products depicted here are in high demand and difficult to get ahold of. I waited some time to obtain some of them and have found that it was worth the wait. Everything I will discuss is available through Phoenix Tactical and I recommend going through Phoenix Tactical exclusively to obtain them.
Lastly, I am not affiliated with Phoenix Tactical or Alamo Four Star in any manner other than being a very satisfied consumer of their products. I am not being paid or reimbursed in any way for this review. Scott Hansen at Phoenix Tactical has been nothing but professional and courteous in my dealings with him. My primary motivation for posting this review is to share what has made my job easier, if Phoenix Tactical receives business as a result I feel it is well deserved.
Now that all that is out of the way,
I decided to make some changes to increase the versatility of my setup. I use my rifle in a wide variety of situations from the flat range to office building roof tops to “urban hides” set up in apartment buildings and houses. I’ve been using a DCLW tripod with side pressure kit for a couple of years with great success but have felt it would perform better if I could lock the rifle in more securely. I ran across this thread: How To Install BT17 Rail for Atlas Bipod in McM A5 - Sniper's Hide Forums and a lightbulb came on. I ordered a 12” picatinny rail blank and put myself in line for the tools that 427Cobra was nice enough to share. Once everything arrived I went to work installing the rail to my stock. Here is the finished product:
**Many thanks to 427Cobra for the tutorial and the use of his tools for this project**
I also contacted Scott at Phoenix Tactical and ordered a DLOC-S, a flat top conversion which replaces the cradle on my DCLW with a flat top and DLOC adapter, a set of prototype “T’s” replacement legs and a set of Leg Lock Screws.
I previously owned a set of the “T’s” replacement legs and Leg Lock Screws for the Harris Bipod which I used for about a year on an Iron Ridge Arms rifle that I sold recently. I have also owned and used Phoenix Tactical’s Pod Claws. I like to shoot very low to the ground and using the DLOC-S and rail setup added some height to my bipod. The “t’s” legs reduce the overall height of the Harris 6”-9” bipod bringing the height back down where I need it.
The only complaint I had with the Pod Claws was that they wanted to grab along the interior of my Eberlestock Phantom scabbard when putting the rifle away, the aggressive claws would also chew into the wood deck at one of the shooting ranges I frequent. The “T’s” footings offer a good compromise in my opinion. They offer both a vertical and horizontal surfaces which still bite into soil and allow substantial bipod loading but also work extremely well on horizontal surfaces such as a concrete curb, the gaps in an automobile body and window sills which can be easily protected from damage by a piece of tape applied before placing the rifle. As you can see the feet on the “T’s” legs are welded to the leg for strength.
The “T’s” legs have a slot cut down the back side that, when combined with the Leg Lock screws, prevent the bipod legs from spinning within the upper legs. This help keep the rifle planted and reduces movement requiring readjusting between shots.
The “T’s” legs also have notches cut to allow the continued use of preset height adjustments available with the Harris bipod.
Phoenix Tactical plans to have the 5.5 Tactical Bipod available with the “T’s” legs available this fall.
With the modifications to my rifle stock and the bipod complete I can now attach the bipod to the rifle at any position along the rail. The bipod remains out on the end the vast majority of the time but I have found moving it toward the rear a bit makes tracking moving targets a bit easier.
The DLOC attachment works very easily. There is a knob which is backed out until it stops.
The end of the knob is then pushed in toward the center line and the adapter opens up to grab the picatinny rail.
The knob is then released which closes the DLOC around the rail. The knob is then tightened back down which locks the adapter to the rail.
The DLOC-S still allows for the swivel feature of the Harris bipod to function and takes all of about three minutes to install.
The DLOC adapter on the DCLW is pretty self explanatory at this point as it works the same as the DLOC-S but attaches the rifle to the DCLW via the rail affixed to the rifle stock. The DCLW offers a fantastic platform for shooting the rifle, tracking moving targets, adjusting for elevation or locking the rifle into position and being able to walk away if necessary.
As you can see from the pics I have enough length on the rail I installed to keep the Harris bipod attached and still utilize the DCLW.
If you have a shorter rail section installed you can remove the bipod and lock the rifle into the tripod. The DCLW is strong enough to support the rifle from the end of the stock.
The DCLW offers four positions for spread of the legs which can be used to stabilize the tripod on uneven surfaces.
The tripod also offers five length adjustments for the legs allowing for an overall height from 19.5” up to 28” with the legs spread to the narrowest setting.
The DCLW weighs in at 4lbs 2.2oz (according to my cheap USPS scale)
The tripod folds up into a package roughly 21.5” long by 4” wide.
The tripod fits nicely into the side pocket of my Eberlestock Phantom pack
Hopefully this will be of some use to shooters out there looking for a quality setup that has worked well for my needs. As I stated in my disclaimers I'm not here trying to say this is the best out there or that it is any better than any other products on the market. It simply works for me.
*********************
Original thread here: https://www.indianagunowners.com/forums/accessories_and_gear/109699-bipod_tripod_review.html
Original thread here: https://www.indianagunowners.com/forums/accessories_and_gear/109699-bipod_tripod_review.html
Last edited by a moderator:

