

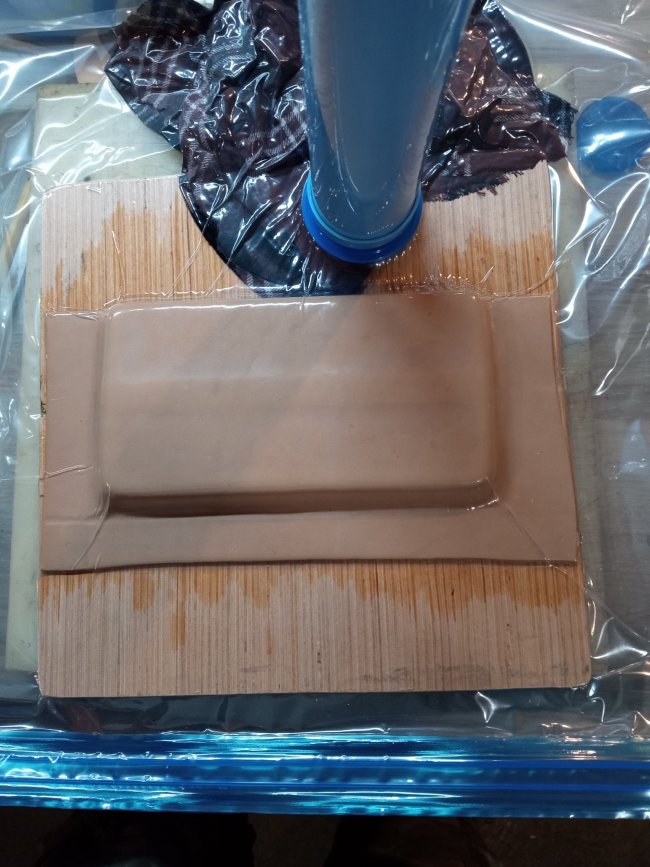
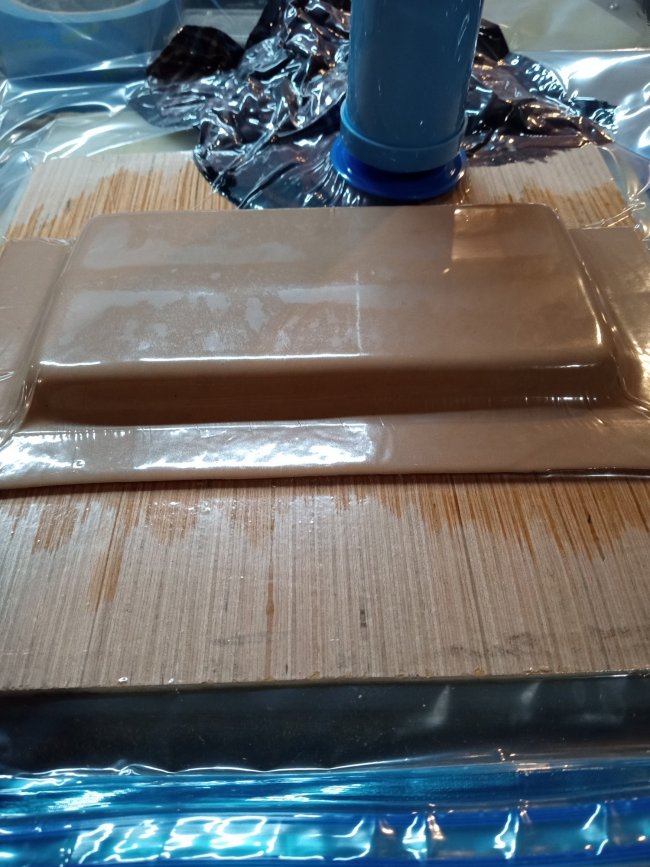
Here's what I came up with for a cell phone case. To keep it sealed from the elements I decided to wet form it. I made a wooden blank to take the place of the phone. I decided to vacuum form it using a regular clothing vacuum bags. The definition shown in the pics is only from the vacuum I didn't use any tools to get it to that point. I'll go through with a bone later and get some sharper corners. Then I'll trim the excess from the edges to the finished size.
-
Be sure to read this post! Beware of scammers. https://www.indianagunowners.com/threads/classifieds-new-online-payment-guidelines-rules-paypal-venmo-zelle-etc.511734/
You are using an out of date browser. It may not display this or other websites correctly.
You should upgrade or use an alternative browser.
You should upgrade or use an alternative browser.
All things leatherworking
- Thread starter freekforge
- Start date
The #1 community for Gun Owners in Indiana
Member Benefits:
Fewer Ads! Discuss all aspects of firearm ownership Discuss anti-gun legislation Buy, sell, and trade in the classified section Chat with Local gun shops, ranges, trainers & other businesses Discover free outdoor shooting areas View up to date on firearm-related events Share photos & video with other members ...and so much more!
Member Benefits:


Got a pretty good form going on. View attachment 274395
And then my cattleman and my very utilitarian holster. Still trying to think of a cool western sounding name for the holster. View attachment 274398
Nice holster.
Thanks. I was carrying it in the holster from the first post but I think a well worn natural holster looks cooler than a tooled one.Nice holster.
While waiting on on the various stages of the phone case project I started a sheath for my knife. It started as a prototype to try the full welt but I kinda like it. It's scrap leather and on the thin side but it will be a good beater sheath so I don't mess up a nice one. Basket weave was done free hand with no guide lines so it's not perfect either. Need to burnish the edges still. Matches my holster too. (Excuse my work belt didn't feel like threading on a gun belt)


First avenger type holster. Both pieces of leather were 8-9oz leaning more towards 9. That's too thick for my taste. I have a piece of 7-8 that I'm going to use for the main body of the next one with a piece of 5-6 leaning towards 6 for the reinforcement piece. Then adjust the stitch lines a tiny bit to get more coverage of the trigger guard. And possibly do double stitch lines all around. Still need to dress the edges some more and put a top coat on it. All in all I'm pleased with how it turned out for a first try.

The second avenger turned out way better. Sits closer to the body and has better definition. This is part of the oldest project on the bench right now. It's part of a set of a holster, mag pouch, and cuff case. Cuff case is drying right now will post pics of it later. It's going to an officer I worked with. Hopefully he will think it was worth the wait.


Here's the cuff case. I used a parker pattern that I modified to my liking. Still need to buff and apply the top coat. Ignore the rusty cuffs they've been sitting in the center console of my truck since my old dept went to hinged cuffs...

 that was like 5 years ago.
that was like 5 years ago.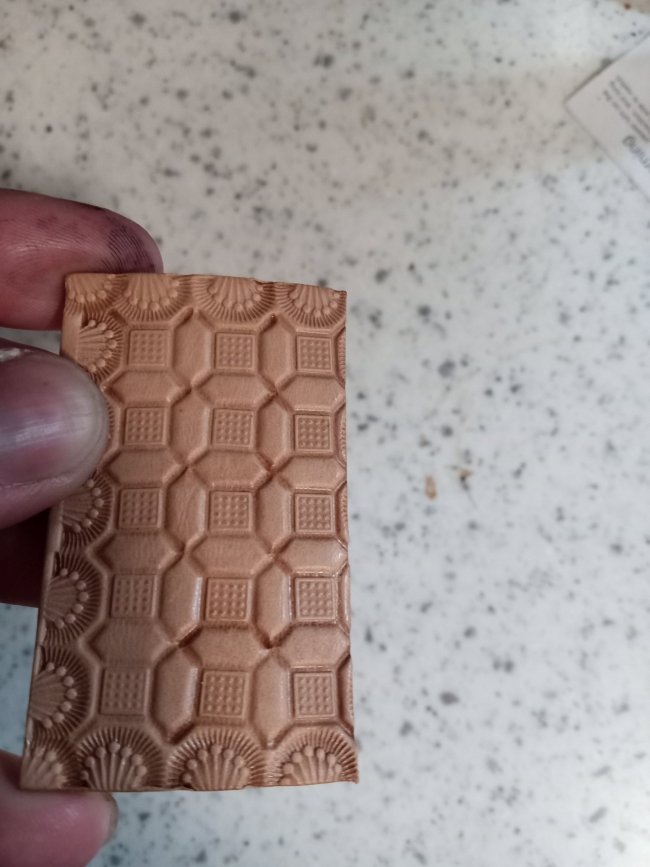


I have some super thick skirting leather that's harder than woodpecker lips that I'm going to make some leather knuckle dusters from. I've seen a couple guys do it from three layers but this stuffs so thick that 2 layers will work. Hopefully it works out because I think it will be pretty cool.

Hopefully be starting it soon. He asked me to make some branded stuff before I get started on the shell bag
Quick project I'm working on in between the bigger branded projects. Top was trimmed then I wet formed some 4-5oz onto the top. Made the bib from some chrome tan with a veg tan initial tag stitched on. Splattered some black dye on it just for fun. Not done need some more fasteners for the bib and then see where he wants the bottom trimmed too.
I have a similar bib on mine. I didn't trim too much off my hood so that when I'm welding lighter stuff I can take it off and save weight but on bigger stuff (or polished stainless) I can slap it back on.
I have a similar bib on mine. I didn't trim too much off my hood so that when I'm welding lighter stuff I can take it off and save weight but on bigger stuff (or polished stainless) I can slap it back on.
Starting some field notes notebook covers today. Theyre going to some LEOs. Going to try some out of veg tan so I can stamp the dept. and badge number also have some black chap leather I'm going to use for the solid black ones. When I find the shade of blue I want I'm going to carve in and paint a blue line across some.
Site Supporter

Members online
- actaeon277
- Horsetrader
- sapper83
- lazarus0213
- 42253
- El Conquistador
- typhoon
- Revdev86
- HoosierLife
- Tbell7
- Hawkeye7br
- mcoppers
- Dechrissen
- imagreaser
- swamptick
- casselmb
- glockman49
- Indyal
- dwagner3701
- jwamplerusa
- Ark
- zoglog
- flint stonez
- Guns&engines
- Grump01
- TheGrumpyGuy
- KMaC
- NICKT93
- jrh84
- LuckyOne
- Count Blackula
- KYLogger
- Hkindiana
- mmpsteve
- BravoOneFour
- worddoer
- irl104
- 2tonic
- BehindBlueI's
- cakndsn
- 60Driver
- KJQ6945
- Flingarrows
- phylodog
- Defensive Shooting Concepts
- BigBoxaJunk
- Butch627
- MrHank
- tjones
- 5point9
Total: 1,885 (members: 311, guests: 1,574)
