

Last year I started to get interested in reloading and began by building a reloading bench and researching and purchasing some reloading equipment and components. While doing research on tumblers and media type I found a thread about wet media tumbling with stainless steel pins. After getting educated I felt cleaning brass with stainless steel pins offered several advantages over the traditional dry media. There are also a few cons to wet media tumbling.
Wet Media Pros:
1. Brass is much cleaner
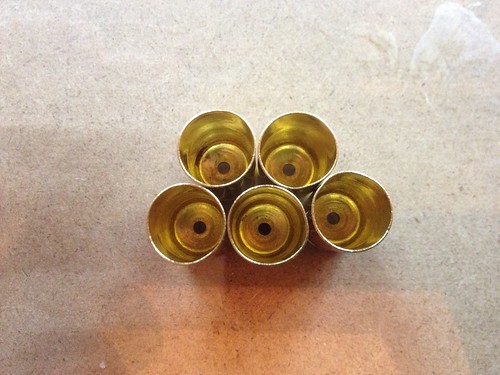
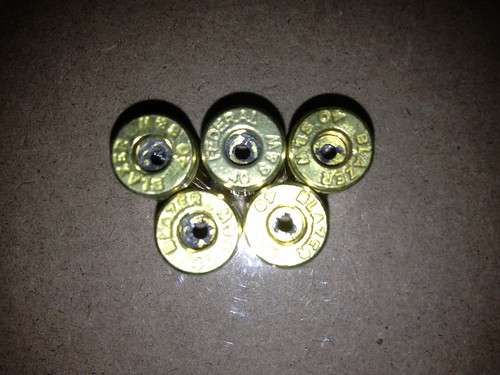
2. Cleans primer pockets
3. No lead / media dust
4. No need to replace media (may need to replenish if pins are lost)
5. Possibly better ballistics due to cleaner brass
6. Easier case inspection
Wet Media Cons:
1. Can be messy
2. Higher initial cost
3. Longer cleaning / drying time
The leading wet media tumbler for cleaning brass in the Thumler's Tumbler Model B High Speed. From the videos and pictures I've seen it does a very good job of cleaning brass. The main problem I have with it is that I am lazy and don't have a lot of extra time. I would much rather clean one large batch of brass than a bunch of smaller batches. The Thumler's Model B has a max rated capacity of 15lb of brass, cleaning media, and water. That works out to only a couple hundred pieces of pistol brass (3lb).
Thumler's Tumbler Model B High Speed typical load:
5lb. media
8lb water (1 gallon)
2-3lb brass
MikeDVB recently made a post about his Thumler's Tumbler. It can be found here. https://www.indianagunowners.com/forums/ammunition_and_reloading/283284-clean_brass.html
Wanting a wet media tumbler but not liking the Thumler's Tumbler here were my objectives for building a tumbler.
Objectives for building a tumbler vs. buying:
1. Larger capacity
2. Quicker cleaning time
3. Easy to open lid (main reason I didn't like Thumler's Tumber)
4. More robust design
5. Save money
I based my build off of the information I learned from reading and watching videos of the tumbler built my BIGGDAWG as posted on Brian Enos and AR15 forums. BIGGDAWG also sells his tumbler on a website he made but I wanted to make my own.
My home built wet tumbler - General Reloading - Brian Enos's Forums... Maku mozo!
How i built my own rotary tumbler - AR15.COM
Biggdawg Tumblers stainless wet tumblers
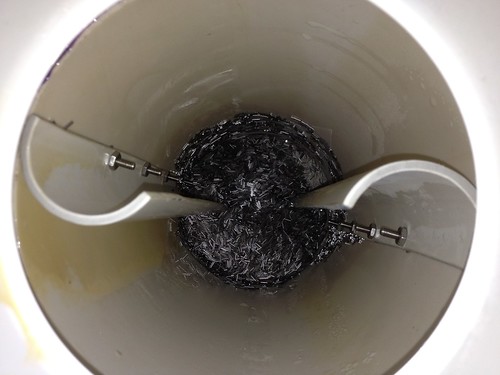
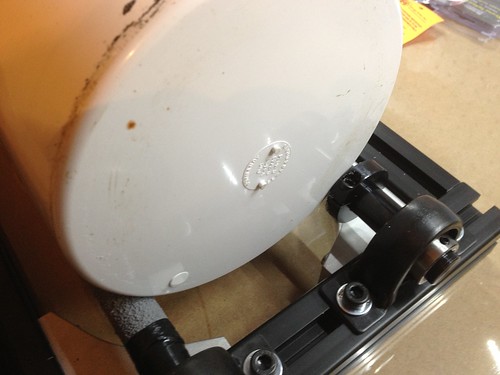
The first part of the tumbler I made was my drum. I constructed it out of 6" PVC drainage pipe with an end cap and reducer with a cap for a lid. To agitate the brass and media I split a 2" piece of PVC pipe and attached it using stainless steel screws to opposite sides of the 6" pipe. I then sealed all seams with silicone. I originally wanted to make a drum from 8" PVC but wasn't able to get any without buying a 8 or 10 foot piece.


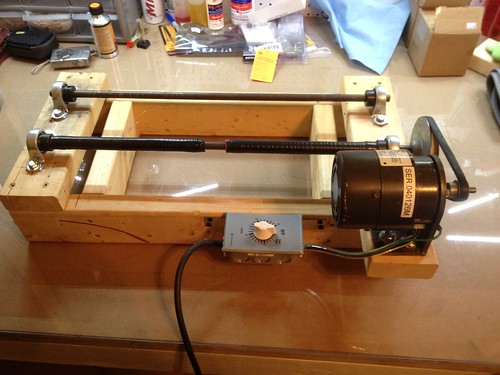
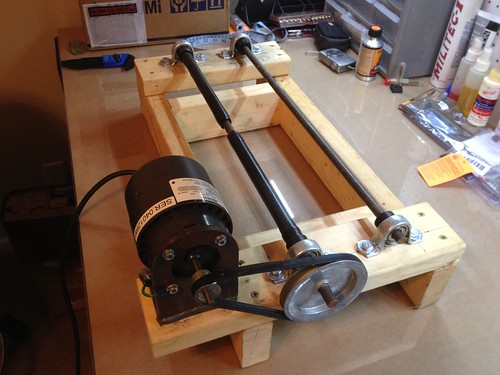
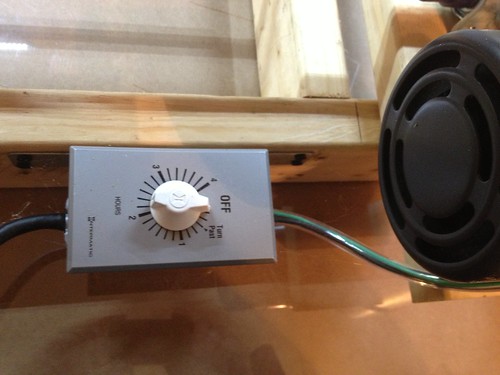
After making my drum I tried making the tumbler. Not having a welder or precision metal cutting tools I decided to try using 2x4s and materials that were available at the local Rural King. It was constructed from 2x4 pieces, 1/2" steel rod, sheet metal housed bearing, 1/15 HP motor, motor, 1" & 4"pulleys, and a timer. I found a few problems when trying to run my this tumbler with my container filled only with water and media.
Tumbler Rev 1 Problems:
1. The 1/2" steel rod would bend with the weight of a full tumbler.
2. Belt misalignment due to bending steel rod.
2. The 1/15 HP motor was overloaded and would over heat. (twice the HP of Thumler's 1/30 HP motor)
3. One of the 2x4s had cracked while assembling
4. The 2x4 construction was bulky
After testing my first tumbler I knew I would need a bigger motor. Due to the 2x4 design to put on a bigger motor I was going to have to change out some 2x4 pieces. Instead of messing with that I decided to go to Rev 2 of my tumbler.
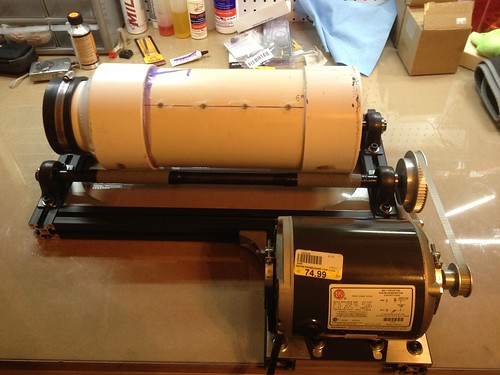
For the second version of my tumbler I decided to go all out and order pre-cut parts that I could bolt together out of the box. I decided to use extruded aluminum due to its strength and being light weight as I will be moving this tumbler around when it's not in use. I ordered all of my parts from a industrial supplier who I use at my work. I picked up a larger 1/3 HP motor at Rural King.
I started off my making a 3D model of my new tumbler design to check to any interferences with the drum and bracing for the extruded aluminum. Making a 3D model also gave me a change to practice modeling as I haven't done much of it.
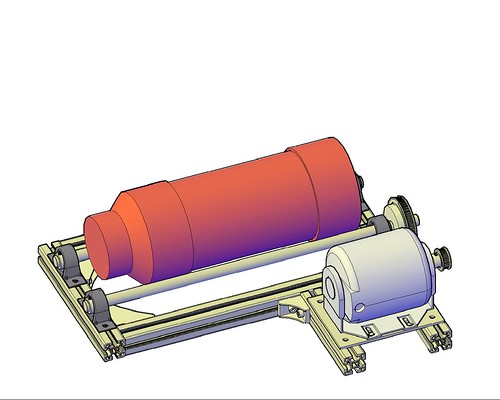
Once I was happy with how the model looked I went ahead and order my parts. Everything I ordered was to the exact dimension I wanted and ready to bolt together. Ordering the parts like this cost more but not having the tools to produce what I wanted myself I thought it was worth the price.
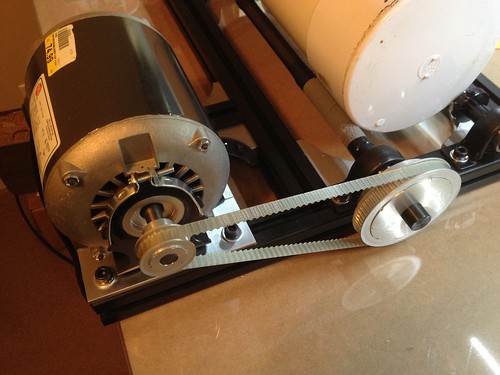
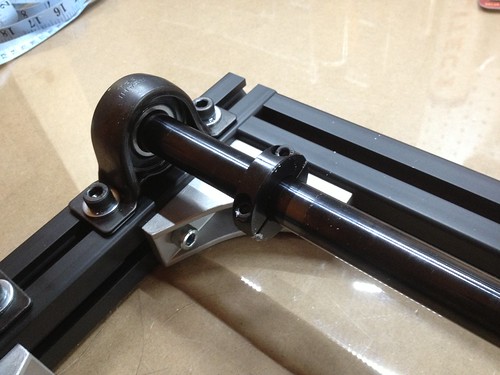
Tumbler Rev2 is constructed of 8 series 40mm x 40mm aluminum extrusion, 20mm dia cold drawn carbon steel shafts, stamped steel pillow block bearings, 1/3 HP motor, timing belt, and pulleys.
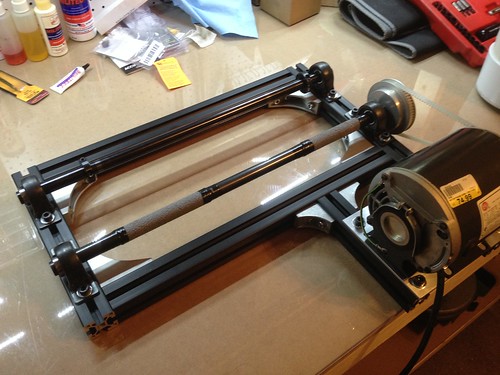
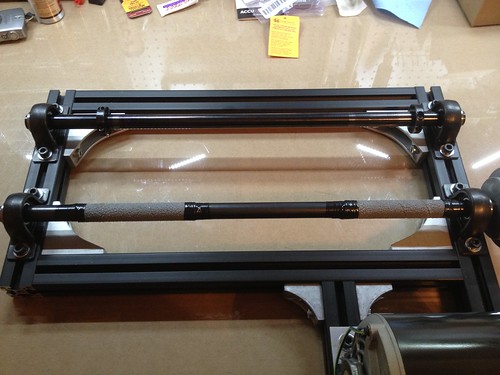
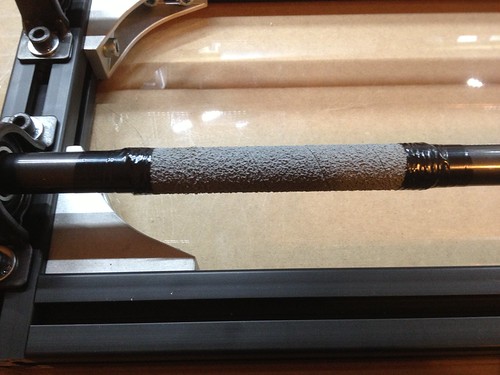
I found some rubber anti-slip tape at the local Ace Hardware that I used to give the tumbler something to grip onto on the drive axel. I used some back plastic tape on the ends just to ensure it doesn't come loose.
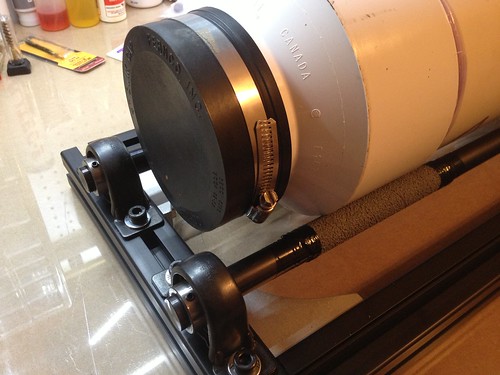
I used two shaft collars to hold the position of the drum if it tries to walk on the rollers.
With my new tumbler completed I was ready to try cleaning some brass. I de-primed all off the .40 brass that I had shot or picked up over the past year. That filled up most of a .30 cal ammo can.
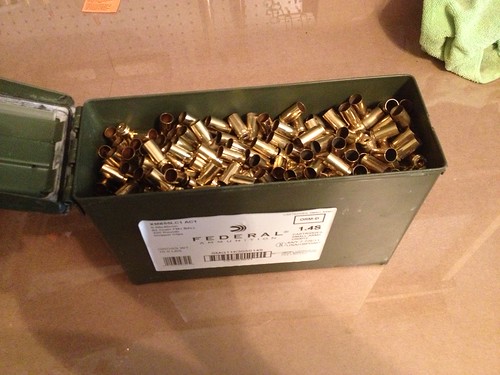
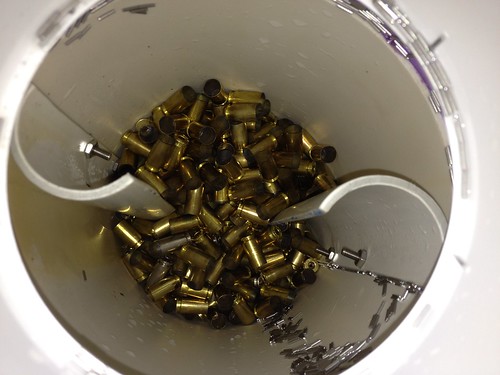
It turns out that a .30 cal ammo can of .40 S&W is around 10lb of brass. It should be over 1,000 brass cases but I don't have an exact number. I dumped the brass into my drum along with 7lbs of stainless steel media. The brass and media filled about half of the drum, still plenty of room for more brass.
I then added 1/4 teaspoon of Lemon Shine, 1 1/2 tablespoons of Dawn Ultra Concentrated dish soap, and water. I think I went a little heavy on the dish soap but everything worked out ok.
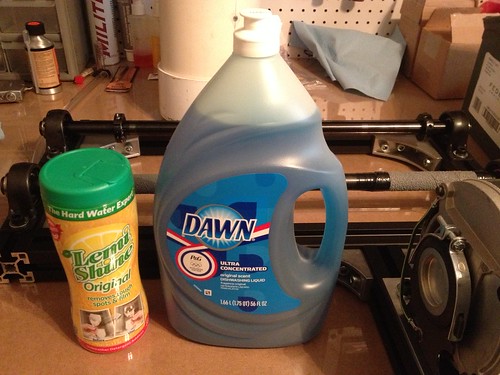
I then ran the tumbler for 3 hours for my first run as that is what BIGGDAWG recommended. I was really pleased with the results. When the brass came out of the tumbler it was shinier then when I purchased it. I am going to try 1 hour next time and see what the results are.
[ame]http://youtu.be/iIo_NsAknyo[/ame]
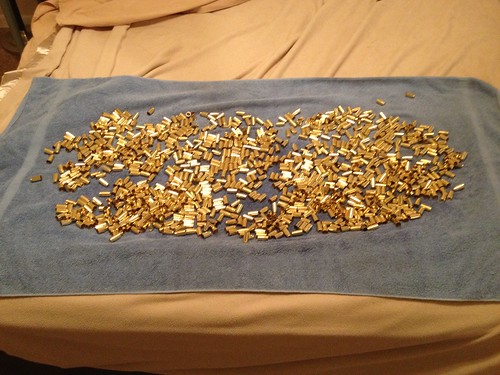
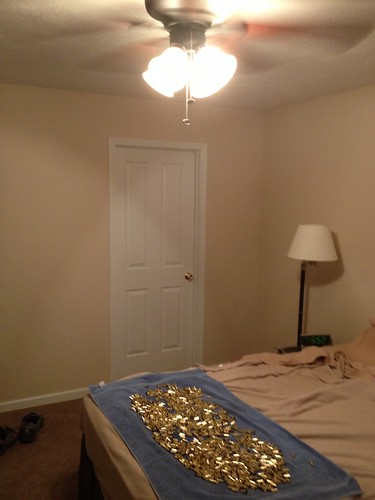
After rinsing off and separating the brass and media using a bucket of water and strainer I dried the brass with a towel then set them out to dry on my bed under my fan.
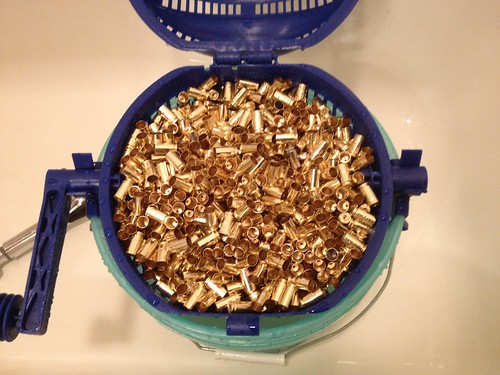
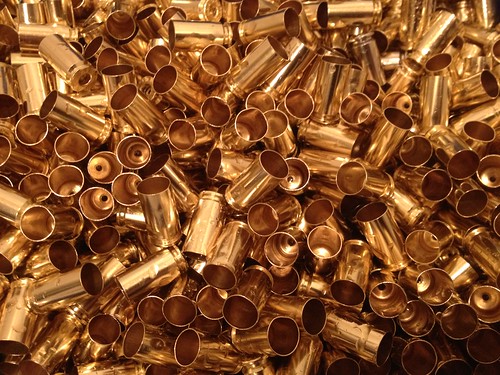
Here are some comparison pictures of the brass before and after cleaning.
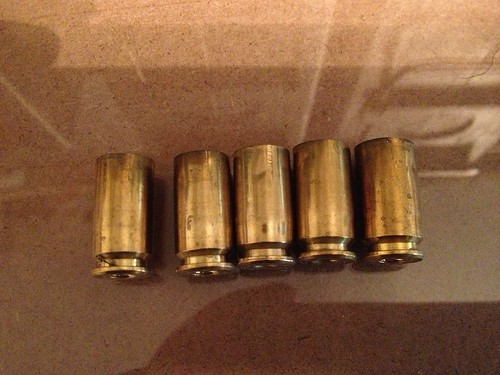
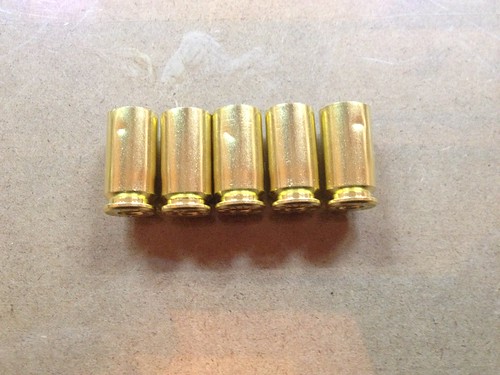

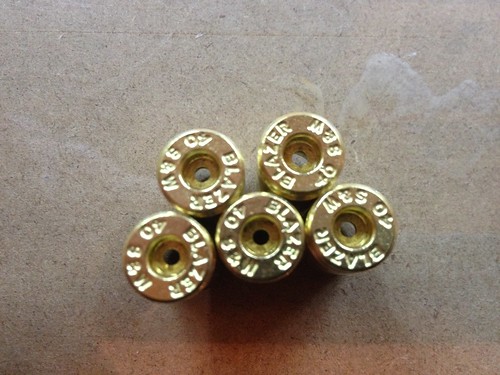
I don't own a vibratory tumbler but here is a comparison of fired brass vs. some vibratory tumbler cleaned bass I bought vs. the wet media cleaned brass.

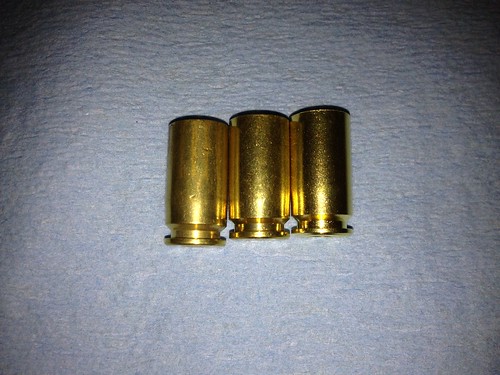
The vibratory tumbled brass I bought wasn't de-primed before cleaning.
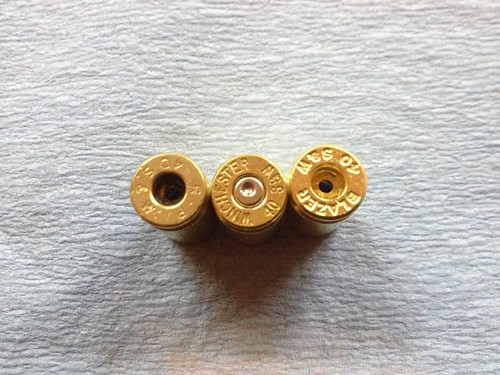
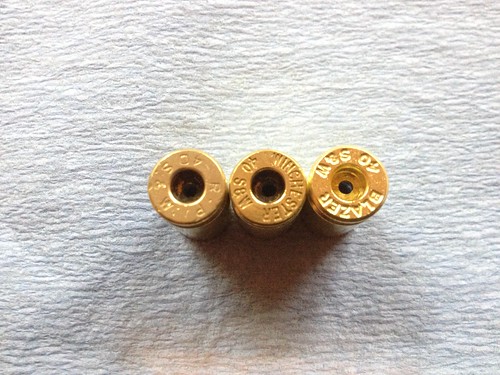
I am very happy with my results and glad that I made my wet media tumbler. Here are the results of my efforts.
Tumbler Rev 2 load:
7lb. media
20lb water (estimated 2.5 gallon)
10lb brass (room for more)
Total Achieved Capacity: 37lb
Objectives for building a tumbler vs. buying:
1. Larger capacity
Done: I was able to run 3 times the amount of brass (10lbs vs. 3lbs) with room to possibly run up to 6 times the amount.
2. Quicker cleaning time
Maybe: I ran my tumbler for about the same as Thumler's Tumbler needs to run. I need to do more testing of running brass for less time. On my first run I just wanted to get some good clean brass.
3. Easy to open lid (main reason I didn't like Thumler's Tumber)
Done: One hose clamp is much easier than six wing nuts ( 1 vs. 6)
4. More robust design
Done: I didn't like that the Thumbler used nylon bearings that rode on the edge of a steel frame. Metal ball bearings in a metal housing with a extruded aluminum frame is more robust than nylon and sheet steel.
5. Save money
Done : It is possible to build this for less than I paid but I still paid less for it than a comparable commercially available tumbler.
I guess this concludes the post on my tumbler. I hope you enjoyed it. I you have question or are interested in making one of these I can provide some more information just let me know.

Edit 6-2-13:
I have had several request for parts list. I finally got around to making a comprehensive list today with prices and where to buy parts. The part # for the aluminum plate that I originally used for my motor mount is no longer available but I was able to configure a new part # that actually costs less. I also included alternative part number if you can cut and drill the aluminum plate yourself.
You may already have or can source some of these parts elsewhere for cheaper but I wanted to provide you with a location where you can buy them if you wanted.
I wasn't sure of the best way to share the parts information on here so I made a Google Docs Spreadsheet with the information.
Google Docs Spreadsheet of Part Numbers
As always let me know if you have questions
Wet Media Pros:
1. Brass is much cleaner
2. Cleans primer pockets
3. No lead / media dust
4. No need to replace media (may need to replenish if pins are lost)
5. Possibly better ballistics due to cleaner brass
6. Easier case inspection
Wet Media Cons:
1. Can be messy
2. Higher initial cost
3. Longer cleaning / drying time
The leading wet media tumbler for cleaning brass in the Thumler's Tumbler Model B High Speed. From the videos and pictures I've seen it does a very good job of cleaning brass. The main problem I have with it is that I am lazy and don't have a lot of extra time. I would much rather clean one large batch of brass than a bunch of smaller batches. The Thumler's Model B has a max rated capacity of 15lb of brass, cleaning media, and water. That works out to only a couple hundred pieces of pistol brass (3lb).
Thumler's Tumbler Model B High Speed typical load:
5lb. media
8lb water (1 gallon)
2-3lb brass
MikeDVB recently made a post about his Thumler's Tumbler. It can be found here. https://www.indianagunowners.com/forums/ammunition_and_reloading/283284-clean_brass.html
Wanting a wet media tumbler but not liking the Thumler's Tumbler here were my objectives for building a tumbler.
Objectives for building a tumbler vs. buying:
1. Larger capacity
2. Quicker cleaning time
3. Easy to open lid (main reason I didn't like Thumler's Tumber)
4. More robust design
5. Save money
I based my build off of the information I learned from reading and watching videos of the tumbler built my BIGGDAWG as posted on Brian Enos and AR15 forums. BIGGDAWG also sells his tumbler on a website he made but I wanted to make my own.
My home built wet tumbler - General Reloading - Brian Enos's Forums... Maku mozo!
How i built my own rotary tumbler - AR15.COM
Biggdawg Tumblers stainless wet tumblers
The first part of the tumbler I made was my drum. I constructed it out of 6" PVC drainage pipe with an end cap and reducer with a cap for a lid. To agitate the brass and media I split a 2" piece of PVC pipe and attached it using stainless steel screws to opposite sides of the 6" pipe. I then sealed all seams with silicone. I originally wanted to make a drum from 8" PVC but wasn't able to get any without buying a 8 or 10 foot piece.
After making my drum I tried making the tumbler. Not having a welder or precision metal cutting tools I decided to try using 2x4s and materials that were available at the local Rural King. It was constructed from 2x4 pieces, 1/2" steel rod, sheet metal housed bearing, 1/15 HP motor, motor, 1" & 4"pulleys, and a timer. I found a few problems when trying to run my this tumbler with my container filled only with water and media.
Tumbler Rev 1 Problems:
1. The 1/2" steel rod would bend with the weight of a full tumbler.
2. Belt misalignment due to bending steel rod.
2. The 1/15 HP motor was overloaded and would over heat. (twice the HP of Thumler's 1/30 HP motor)
3. One of the 2x4s had cracked while assembling
4. The 2x4 construction was bulky
After testing my first tumbler I knew I would need a bigger motor. Due to the 2x4 design to put on a bigger motor I was going to have to change out some 2x4 pieces. Instead of messing with that I decided to go to Rev 2 of my tumbler.
For the second version of my tumbler I decided to go all out and order pre-cut parts that I could bolt together out of the box. I decided to use extruded aluminum due to its strength and being light weight as I will be moving this tumbler around when it's not in use. I ordered all of my parts from a industrial supplier who I use at my work. I picked up a larger 1/3 HP motor at Rural King.
I started off my making a 3D model of my new tumbler design to check to any interferences with the drum and bracing for the extruded aluminum. Making a 3D model also gave me a change to practice modeling as I haven't done much of it.
Once I was happy with how the model looked I went ahead and order my parts. Everything I ordered was to the exact dimension I wanted and ready to bolt together. Ordering the parts like this cost more but not having the tools to produce what I wanted myself I thought it was worth the price.
Tumbler Rev2 is constructed of 8 series 40mm x 40mm aluminum extrusion, 20mm dia cold drawn carbon steel shafts, stamped steel pillow block bearings, 1/3 HP motor, timing belt, and pulleys.
I found some rubber anti-slip tape at the local Ace Hardware that I used to give the tumbler something to grip onto on the drive axel. I used some back plastic tape on the ends just to ensure it doesn't come loose.
I used two shaft collars to hold the position of the drum if it tries to walk on the rollers.
With my new tumbler completed I was ready to try cleaning some brass. I de-primed all off the .40 brass that I had shot or picked up over the past year. That filled up most of a .30 cal ammo can.
It turns out that a .30 cal ammo can of .40 S&W is around 10lb of brass. It should be over 1,000 brass cases but I don't have an exact number. I dumped the brass into my drum along with 7lbs of stainless steel media. The brass and media filled about half of the drum, still plenty of room for more brass.
I then added 1/4 teaspoon of Lemon Shine, 1 1/2 tablespoons of Dawn Ultra Concentrated dish soap, and water. I think I went a little heavy on the dish soap but everything worked out ok.
I then ran the tumbler for 3 hours for my first run as that is what BIGGDAWG recommended. I was really pleased with the results. When the brass came out of the tumbler it was shinier then when I purchased it. I am going to try 1 hour next time and see what the results are.
[ame]http://youtu.be/iIo_NsAknyo[/ame]
After rinsing off and separating the brass and media using a bucket of water and strainer I dried the brass with a towel then set them out to dry on my bed under my fan.
Here are some comparison pictures of the brass before and after cleaning.
I don't own a vibratory tumbler but here is a comparison of fired brass vs. some vibratory tumbler cleaned bass I bought vs. the wet media cleaned brass.
The vibratory tumbled brass I bought wasn't de-primed before cleaning.
I am very happy with my results and glad that I made my wet media tumbler. Here are the results of my efforts.
Tumbler Rev 2 load:
7lb. media
20lb water (estimated 2.5 gallon)
10lb brass (room for more)
Total Achieved Capacity: 37lb
Objectives for building a tumbler vs. buying:
1. Larger capacity
Done: I was able to run 3 times the amount of brass (10lbs vs. 3lbs) with room to possibly run up to 6 times the amount.
2. Quicker cleaning time
Maybe: I ran my tumbler for about the same as Thumler's Tumbler needs to run. I need to do more testing of running brass for less time. On my first run I just wanted to get some good clean brass.
3. Easy to open lid (main reason I didn't like Thumler's Tumber)
Done: One hose clamp is much easier than six wing nuts ( 1 vs. 6)
4. More robust design
Done: I didn't like that the Thumbler used nylon bearings that rode on the edge of a steel frame. Metal ball bearings in a metal housing with a extruded aluminum frame is more robust than nylon and sheet steel.
5. Save money
Done : It is possible to build this for less than I paid but I still paid less for it than a comparable commercially available tumbler.
I guess this concludes the post on my tumbler. I hope you enjoyed it. I you have question or are interested in making one of these I can provide some more information just let me know.
Edit 6-2-13:
I have had several request for parts list. I finally got around to making a comprehensive list today with prices and where to buy parts. The part # for the aluminum plate that I originally used for my motor mount is no longer available but I was able to configure a new part # that actually costs less. I also included alternative part number if you can cut and drill the aluminum plate yourself.
You may already have or can source some of these parts elsewhere for cheaper but I wanted to provide you with a location where you can buy them if you wanted.
I wasn't sure of the best way to share the parts information on here so I made a Google Docs Spreadsheet with the information.
Google Docs Spreadsheet of Part Numbers
As always let me know if you have questions
Last edited:

") .
.
