I'm using these videos as a template for some of the steps I'm trying to do, but I'd like help or input from anyone else who has worked on this type of gun:
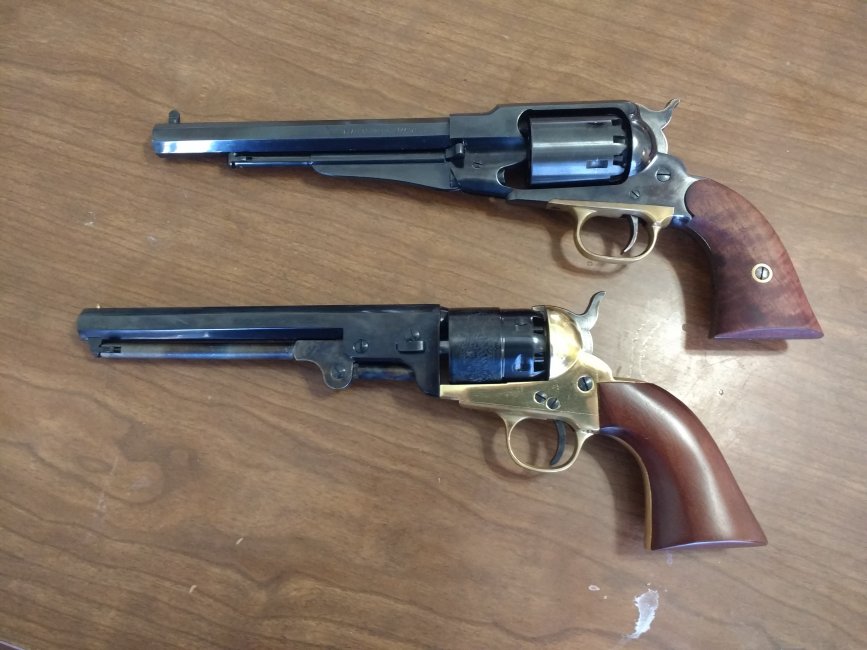
I have a brass frame Pietta 1851 Navy and a Pietta 1858 Army that I'm looking to both smooth up the cocking and cylinder action on and, hopefully, decrease the felt weight of the cocking. The 1851 is new but the 1858 has had some rounds through it. The 1858 has a particularly heavy and gritty cocking action, possibly due to the fact that at one point it was cleaned improperly and allowed to rust so bad I had to beat the cylinder rod out and brush/steel wool all the rust away. I know that heavier hammer falls are required to set off caps reliably, but I'd still like to not have to break my grip or use my off hand to cock it.
Currently I'm planning to pick up some diamond hones and a needle file and do the following:
-Lightly deburr the wedge channel
-Smooth the inside of the arbor/pin channel on the cylinder
-Deburr and smooth out the hammer face to minimize cap sucking
-Deburr the smooth the two insides of the frame to reduce friction and remove any machining marks, probably finish with 600 or 1000 grit wet sandpaper
-Deburr the pin channel in the hammer, wrap some 1000 grit around a drill bit and wet sand the inside of the channel to smooth it
-Lightly wet sand the sides of the hammer and hand, then hit those same surfaces with a dremel polishing wheel and very mild compound to make them as close to mirror smooth as I can
-Smooth out the pins that the hammer, hand, and bolt ride on, using the strip of sandpaper technique in the third video
For the time being I'm not looking to modify the main springs, just try to wipe out any friction or grittiness that is contributing to a heavier cocking weight.
Are there any other spots I'm missing or things I should look out for? These guns are pretty simple, I only count about a dozen metal-to-metal movement points that need to be deburred and made as smooth as possible.