Milling and mounting for a red dot

The #1 community for Gun Owners in Indiana

Member Benefits:

  • Fewer Ads!
  • Discuss all aspects of firearm ownership
  • Discuss anti-gun legislation
  • Buy, sell, and trade in the classified section
  • Chat with Local gun shops, ranges, trainers & other businesses
  • Discover free outdoor shooting areas
  • View up to date on firearm-related events
  • Share photos & video with other members
  • ...and so much more!
  • ditcherman

    Grandmaster
    Site Supporter
    Rating - 100%
    22   0   0
    Dec 18, 2018
    7,711
    113
    In the country, hopefully.
    I hope you don't mind @ditcherman, but I'm going to reveal my little journey inspired by you.

    I'll go ahead and reveal my intentions. This all started because I have an extra Holosun red dot that I decided I want to install on my Witness .45acp. Being that I prefer to be self-sufficient as much as possible in my endeavors in life, I really didn't want to farm out the optics cut this time. No offense to AllenM or anyone else in that regard. Allen has performed several optics cuts for me in the past and I highly recommend him. I want to learn the way, but I'm on a budget. Research began on converting my drill press to a pseudo mill, so here I am.

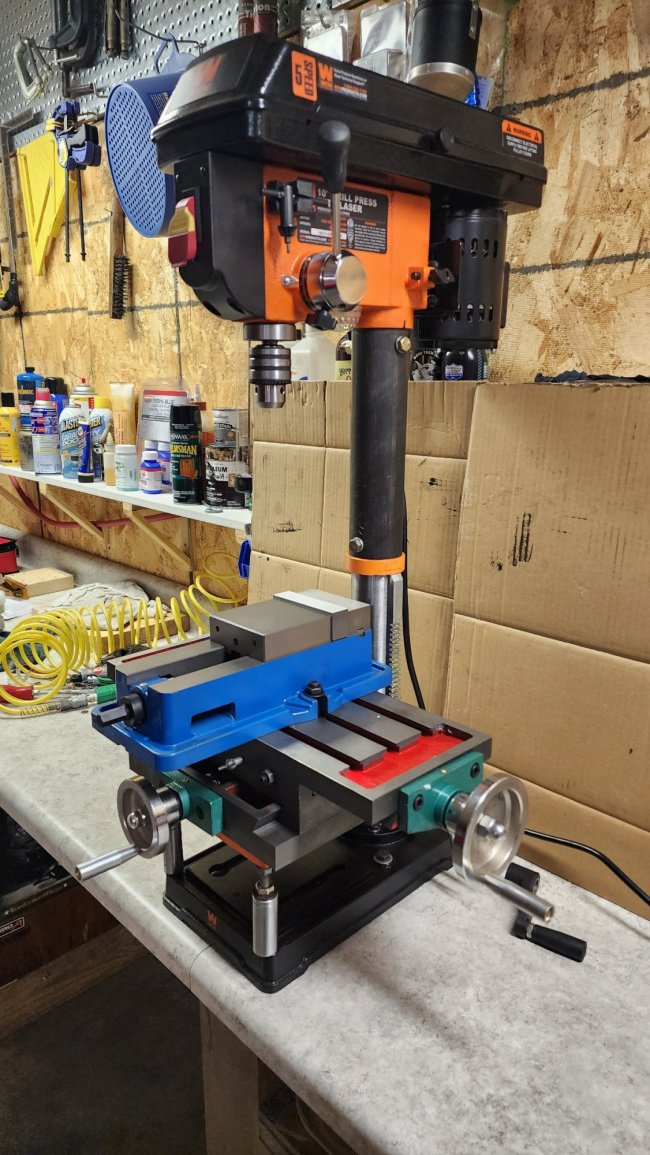
    Quick background. I have a Wen 10" drill press that has a low number of hours on it, so it's in great condition. I can adjust speed up to 3100 rpm. I bought an XY table (Vevor brand), a milling vise (Kurt style Vevor brand) and an end mill suitable for cutting steel (AlTiN Coating). Then I began to realize I needed more if I was going to really try and pull off an optics cut. The plan isn't to get perfection, I'm hoping to get good enough where I can do some final clean up with files and sandpaper. Not looking to go commercial/professional here, more like professional amateur for my own fun (and learning). Again, I'm on a budget. I don't have finances or room for a Bridgeport. The cheapest mini-mill I can find is around $800-$900 and the slightly larger ones from Grizzly and such start getting into $2k on up. I've seen used Bridgeports in the $1500 to $3000 price range, again no money or room for that on top of whatever is involved to convert them to single phase 220V.

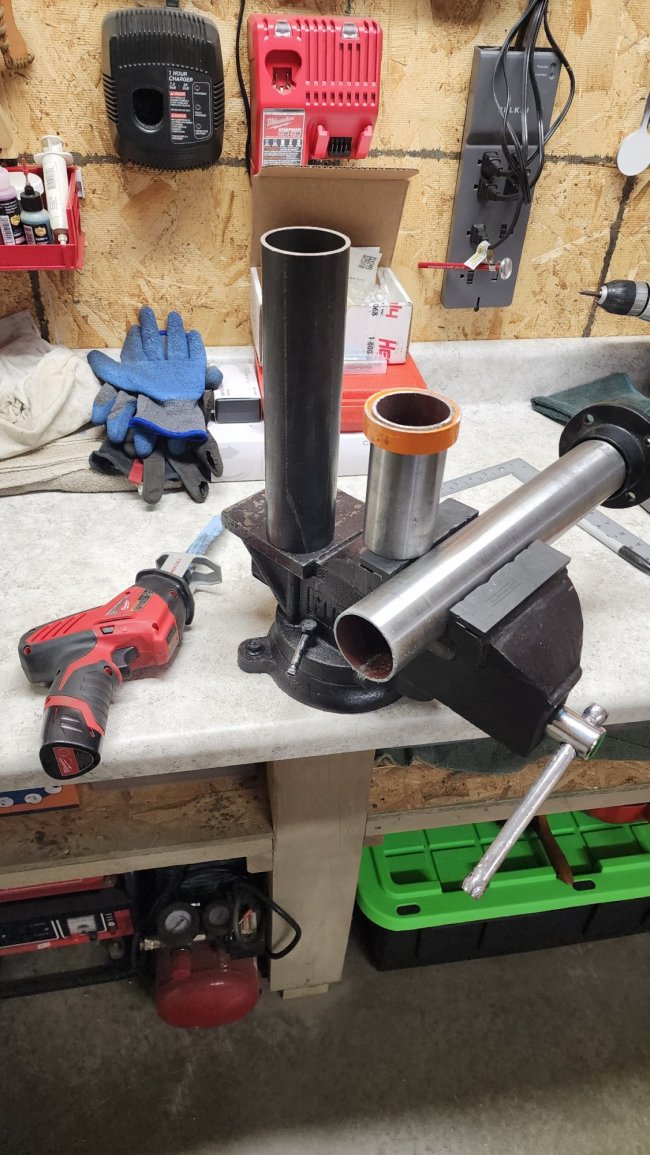
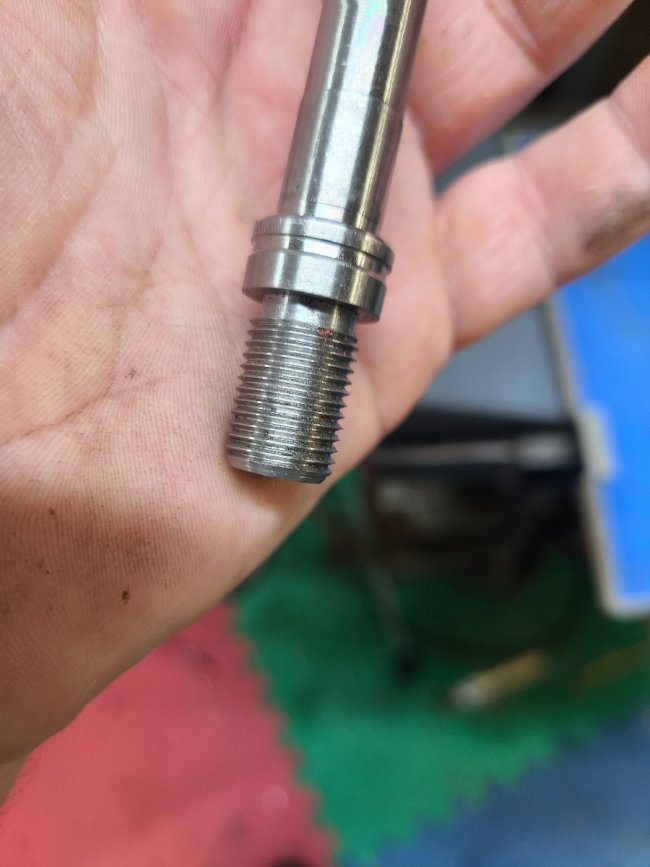
    The drill press (pseudo mill) upgrades continue with an 8" Vevor brand rotary table, 123 blocks and t-slot hold down kit on order. Hoping to have my spindle threaded this week for use with the ER-16 collet holder. Today's goal is to find a replacement column/tube that is taller, need about 3-4" of increased height on the press. First option is contacting the manufacturer, Wen. Second option is going to the local metal supply house. It's not a commonly used size and has an OD of 2.28" with an ID of 2.11". If I go the metal supply house route, it looks like 1020 DOM mild steel tubing with an OD of 2.5" and ID of 2.26" will have to be used as a sleeve/extension piece onto my existing column, which will require some fitting because the ID is smaller than the OD of my current tube by about .020". Not ideal, but it gives me easily adjustable height by still using my press's table that has a crank/rack setup.

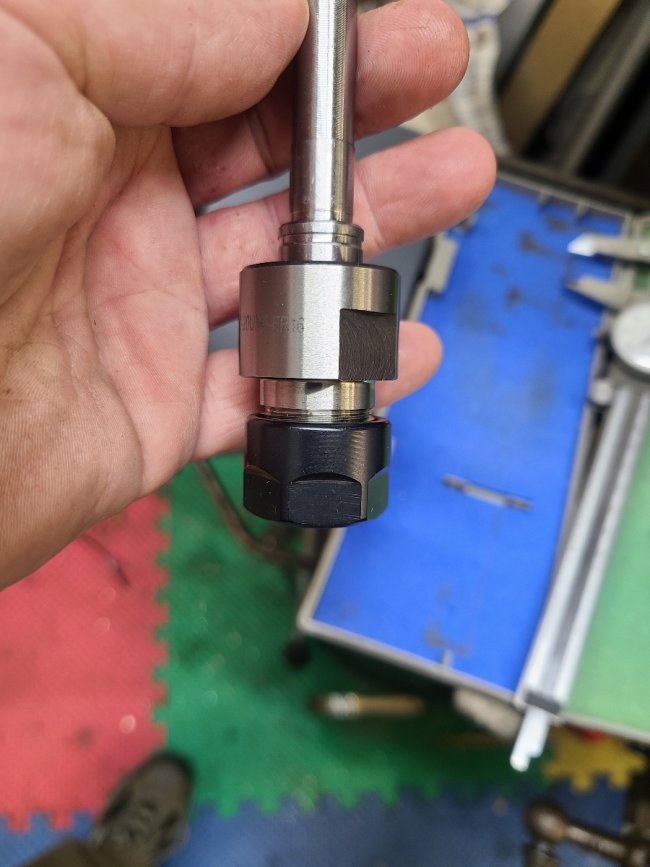
    To clarify, for our folks with actual machinist experience, I am well aware of the difference between a drill press and a mill. I did the amount of research I determined necessary. There are other folks that have converted their drill press for milling operations. I read their builds and watched their videos, multiple times. The two common areas of concern seem to be 1) The tapered mounting of the cutting tool head causing the tool head to fall off with too much side load pressure. I am addressing this by having an extra spindle, that's originally a Jacobs JT-33 taper, threaded 1/2-20 for use with an ER-16 collet holder purchased from Hemly Tool Supply out of Ohio. 2) The use of angular contact bearings to withstand increased radial load (side load). The bearings used in the drill press are 6201 and 6203 deep groove ball bearings, which are designed to withstand axial and radial loads. I'm familiar with these bearings because they've been using them in the transportation industry for years in pulleys and other belt driven components. In fact, one of the people who modified their press stated the angular contact bearings were not required and did a direct comparison, showing no difference in the milling surface produced. Even if I developed issues with my bearings, they are cheap and readily available along with being easy to replace.

    The nice thing about this upgrade to my press is that this allows me to perform things I've done before faster and easier along with opening the door to future projects I previously discarded. I dabble in woodworking, car repairs, home repairs and other various chores a family man with a house might encounter.


    ER-16 collet kit: https://www.ebay.com/itm/184143565063
    End Mill: www.amazon.com/dp/B097CYX5RV?psc=1&ref=ppx_yo2ov_dt_b_product_details
    XY Table: www.amazon.com/dp/B0713YLS3K?psc=1&ref=ppx_yo2ov_dt_b_product_details
    Milling vise: www.amazon.com/dp/B07F8PBQRH?psc=1&ref=ppx_yo2ov_dt_b_product_details
    Parallel bars: www.amazon.com/dp/B00QSS3OV0?psc=1&ref=ppx_yo2ov_dt_b_product_details
    Test indicator: www.amazon.com/dp/B07D96JP7K?psc=1&ref=ppx_yo2ov_dt_b_product_details
    Dial indicator: www.amazon.com/dp/B07C756TCM?psc=1&ref=ppx_yo2ov_dt_b_product_details
    Rotary Table: www.amazon.com/dp/B07YMQ72MQ?psc=1&ref=ppx_yo2ov_dt_b_product_details
    123 blocks: www.amazon.com/dp/B0000AY61E?psc=1&ref=ppx_yo2ov_dt_b_product_details
    Clamping kit: www.amazon.com/gp/product/B00N415N6I/ref=ppx_yo_dt_b_asin_title_o02_s00?ie=UTF8&psc=1


    Here are some pictures of my project mocked up at the moment:

    View attachment 253333
    View attachment 253334
    View attachment 253336
    Dude thats awesome, you do so much research to make sure you can use what you have, know those limitations, and move forward to the goal.

    Just like shooting, it’s the equipment between the ears that will bring success, even though buying all the “right” gear is the trap we fall into so often.
     

    MindfulMan

    Grandmaster
    Site Supporter
    Rating - 100%
    6   0   0
    Feb 14, 2016
    17,795
    113
    Indiana
    I hope you don't mind @ditcherman, but I'm going to reveal my little journey inspired by you.

    I'll go ahead and reveal my intentions. This all started because I have an extra Holosun red dot that I decided I want to install on my Witness .45acp. Being that I prefer to be self-sufficient as much as possible in my endeavors in life, I really didn't want to farm out the optics cut this time. No offense to AllenM or anyone else in that regard. Allen has performed several optics cuts for me in the past and I highly recommend him. I want to learn the way, but I'm on a budget. Research began on converting my drill press to a pseudo mill, so here I am.

    Quick background. I have a Wen 10" drill press that has a low number of hours on it, so it's in great condition. I can adjust speed up to 3100 rpm. I bought an XY table (Vevor brand), a milling vise (Kurt style Vevor brand) and an end mill suitable for cutting steel (AlTiN Coating). Then I began to realize I needed more if I was going to really try and pull off an optics cut. The plan isn't to get perfection, I'm hoping to get good enough where I can do some final clean up with files and sandpaper. Not looking to go commercial/professional here, more like professional amateur for my own fun (and learning). Again, I'm on a budget. I don't have finances or room for a Bridgeport. The cheapest mini-mill I can find is around $800-$900 and the slightly larger ones from Grizzly and such start getting into $2k on up. I've seen used Bridgeports in the $1500 to $3000 price range, again no money or room for that on top of whatever is involved to convert them to single phase 220V.

    The drill press (pseudo mill) upgrades continue with an 8" Vevor brand rotary table, 123 blocks and t-slot hold down kit on order. Hoping to have my spindle threaded this week for use with the ER-16 collet holder. Today's goal is to find a replacement column/tube that is taller, need about 3-4" of increased height on the press. First option is contacting the manufacturer, Wen. Second option is going to the local metal supply house. It's not a commonly used size and has an OD of 2.28" with an ID of 2.11". If I go the metal supply house route, it looks like 1020 DOM mild steel tubing with an OD of 2.5" and ID of 2.26" will have to be used as a sleeve/extension piece onto my existing column, which will require some fitting because the ID is smaller than the OD of my current tube by about .020". Not ideal, but it gives me easily adjustable height by still using my press's table that has a crank/rack setup.

    To clarify, for our folks with actual machinist experience, I am well aware of the difference between a drill press and a mill. I did the amount of research I determined necessary. There are other folks that have converted their drill press for milling operations. I read their builds and watched their videos, multiple times. The two common areas of concern seem to be 1) The tapered mounting of the cutting tool head causing the tool head to fall off with too much side load pressure. I am addressing this by having an extra spindle, that's originally a Jacobs JT-33 taper, threaded 1/2-20 for use with an ER-16 collet holder purchased from Hemly Tool Supply out of Ohio. 2) The use of angular contact bearings to withstand increased radial load (side load). The bearings used in the drill press are 6201 and 6203 deep groove ball bearings, which are designed to withstand axial and radial loads. I'm familiar with these bearings because they've been using them in the transportation industry for years in pulleys and other belt driven components. In fact, one of the people who modified their press stated the angular contact bearings were not required and did a direct comparison, showing no difference in the milling surface produced. Even if I developed issues with my bearings, they are cheap and readily available along with being easy to replace.

    The nice thing about this upgrade to my press is that this allows me to perform things I've done before faster and easier along with opening the door to future projects I previously discarded. I dabble in woodworking, car repairs, home repairs and other various chores a family man with a house might encounter.


    ER-16 collet kit: https://www.ebay.com/itm/184143565063
    End Mill: www.amazon.com/dp/B097CYX5RV?psc=1&ref=ppx_yo2ov_dt_b_product_details
    XY Table: www.amazon.com/dp/B0713YLS3K?psc=1&ref=ppx_yo2ov_dt_b_product_details
    Milling vise: www.amazon.com/dp/B07F8PBQRH?psc=1&ref=ppx_yo2ov_dt_b_product_details
    Parallel bars: www.amazon.com/dp/B00QSS3OV0?psc=1&ref=ppx_yo2ov_dt_b_product_details
    Test indicator: www.amazon.com/dp/B07D96JP7K?psc=1&ref=ppx_yo2ov_dt_b_product_details
    Dial indicator: www.amazon.com/dp/B07C756TCM?psc=1&ref=ppx_yo2ov_dt_b_product_details
    Rotary Table: www.amazon.com/dp/B07YMQ72MQ?psc=1&ref=ppx_yo2ov_dt_b_product_details
    123 blocks: www.amazon.com/dp/B0000AY61E?psc=1&ref=ppx_yo2ov_dt_b_product_details
    Clamping kit: www.amazon.com/gp/product/B00N415N6I/ref=ppx_yo_dt_b_asin_title_o02_s00?ie=UTF8&psc=1


    Here are some pictures of my project mocked up at the moment:

    View attachment 253333
    View attachment 253334
    View attachment 253336

    Very cool setup, my friend ! :thumbsup:
     

    ditcherman

    Grandmaster
    Site Supporter
    Rating - 100%
    22   0   0
    Dec 18, 2018
    7,711
    113
    In the country, hopefully.

    T-DOGG

    I'm Spicy, deal with it.
    Site Supporter
    Rating - 99.6%
    263   1   0
    Feb 4, 2011
    17,504
    149
    New Haven
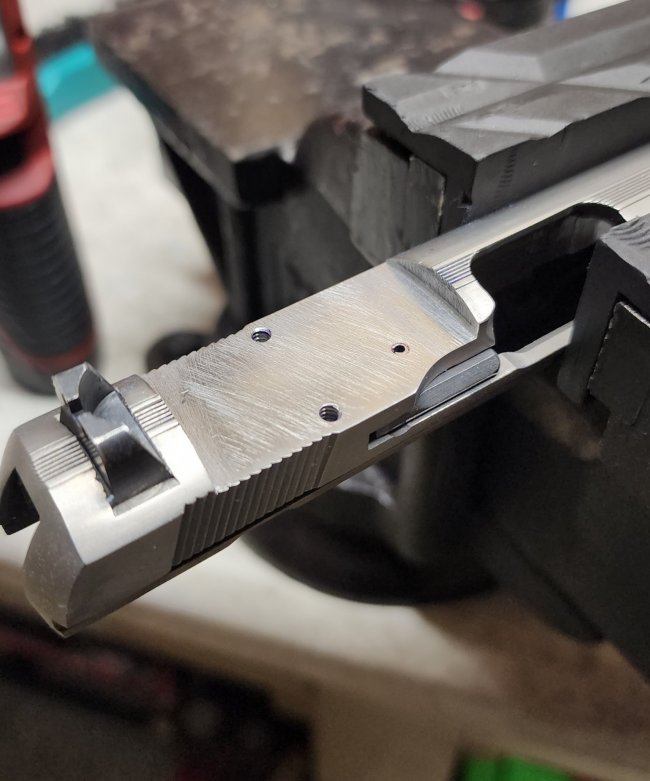
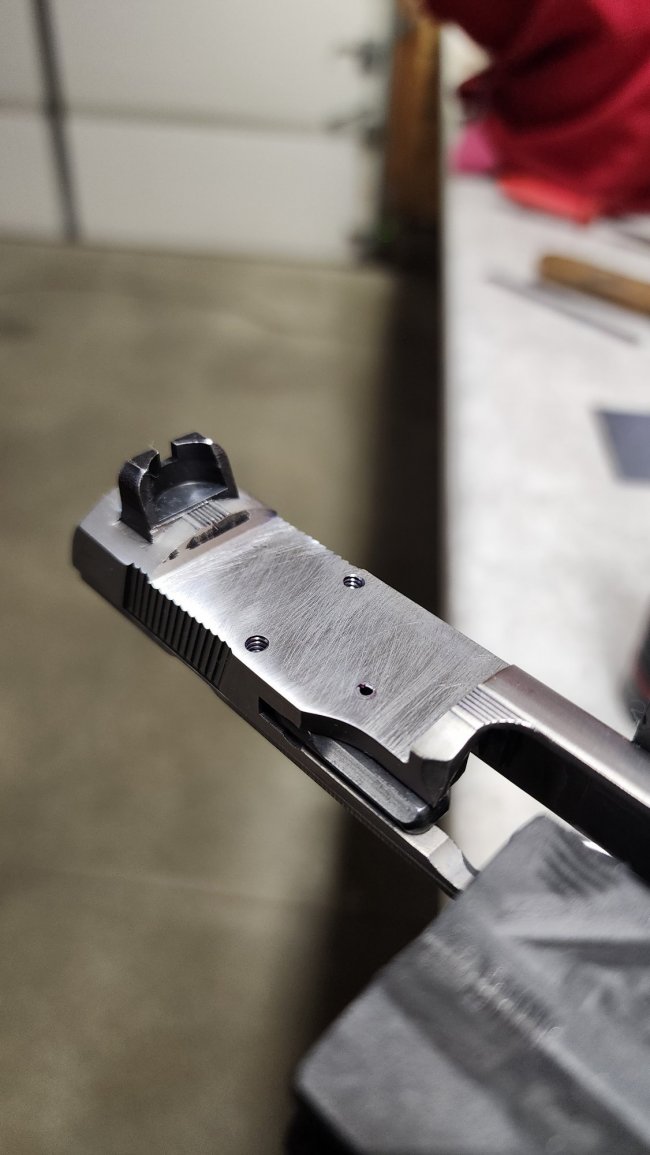
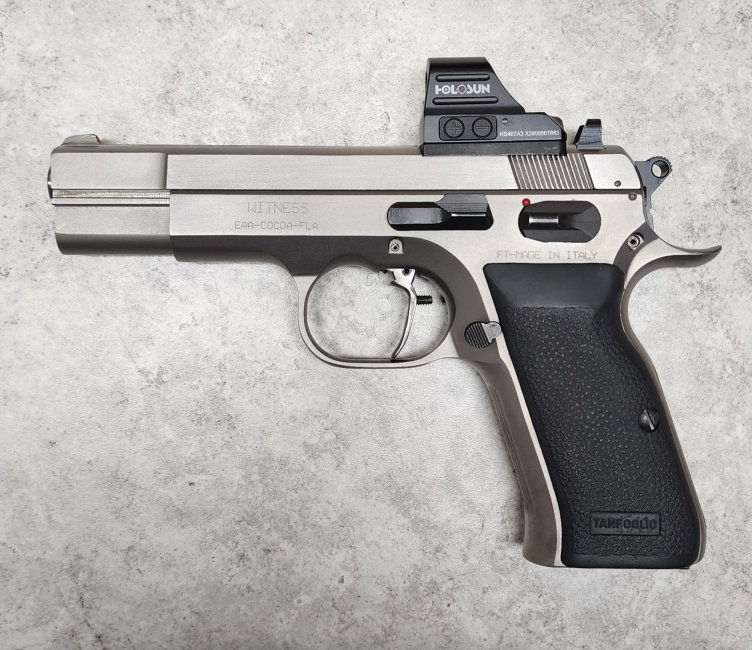
    Completed my first optics cut (Tanfo Witness) and discovered I needed the 1 degree angled shim to get me enough elevation. Was going to use the modified EGW plate in the picture, but decided I like the thinner plate instead, so it's on order now. Pretty good for a drill press setup. Now to decide if I want to take the leap to an actual mill.

    Shout out to @55fairlane for threading my spindle to accept the ER-16 collet holder.

    20230213_214001.jpg
    20230213_214013.jpg
    20230213_224506.jpg
    IMG_20230211_155058.jpg
    IMG_20230211_155056.jpg
     

    55fairlane

    Master
    Rating - 100%
    4   0   0
    Jan 15, 2016
    2,261
    113
    New Haven
    CNC is only as good as the programmer, and how well the machine is set up.
    If the machine has any slop, it can ruin a project with tight tolerances. If cutter dia.
    isn't exact, it to can ruin the project with those tight tolerances, or at minimum if it's
    undersized, is cause a program adjustment. CNC is great for production runs, once dialed in, but for a one off, I would choose manual.
    With manual machining, the tolerances can be adjusted on the fly, without having to change the toolpaths.
    I'm guessing it's just a square dado being cut in the slide? I'm sure you can do it.

    Maybe AllenM's opinion would be different.
    My opinion is different. If you do this kinda mount on a regular basis, thie time is well spent, writing a program and keeping that program in your machine library.
    I do a lot of 1 & 2 piece runs, I keep good set up notes, I keep the tools "set" I toss the part/fixture in and can running in like 20 minutes.
     

    55fairlane

    Master
    Rating - 100%
    4   0   0
    Jan 15, 2016
    2,261
    113
    New Haven
    Progress. Added 7" of height to the column. That was not fun. The tube was 58mm OD. Closest thing I found was some 1026 DOM tubing with a 2.5" OD and 2.26" ID. After a few "fun" hours, it came together.

    View attachment 253539
    View attachment 253540
    Fill the column with cement , then bolt the machine to a 1 to 2 inch plate of cast iron or steel, then bolt the plate down, that will add more rigidity.
     

    Lpherr

    ________________
    Rating - 0%
    0   0   0
    Dec 26, 2021
    7,230
    113
    Occupied
    My opinion is different. If you do this kinda mount on a regular basis, thie time is well spent, writing a program and keeping that program in your machine library.
    I do a lot of 1 & 2 piece runs, I keep good set up notes, I keep the tools "set" I toss the part/fixture in and can running in like 20 minutes.
    That's why I stated that for a one off, it would probably be easier, and faster, to do it manually.
    And he got it done, and it looks like he did a nice job... manually.
     

    55fairlane

    Master
    Rating - 100%
    4   0   0
    Jan 15, 2016
    2,261
    113
    New Haven
    That's why I stated that for a one off, it would probably be easier, and faster, to do it manually.
    And he got it done, and it looks like he did a nice job... manually.
    Yes it does look like @T-DOGG did a nice job. And certainly so, as this saw one of his first machine shop projects. I can't speak to the fit & finish, but it certainly does look good!
     

    ditcherman

    Grandmaster
    Site Supporter
    Rating - 100%
    22   0   0
    Dec 18, 2018
    7,711
    113
    In the country, hopefully.
    To continue my saga into my first optic mill, took that finished product to the range with the Eotech and it wouldn’t sight in, shot low with adjustment all the way towards ‘up’. At the same time, shot a p320 with an Eotech on it and the dot went berserk, which I’ve documented elsewhere. They’re sent off and I’ll update that thread when I know more.

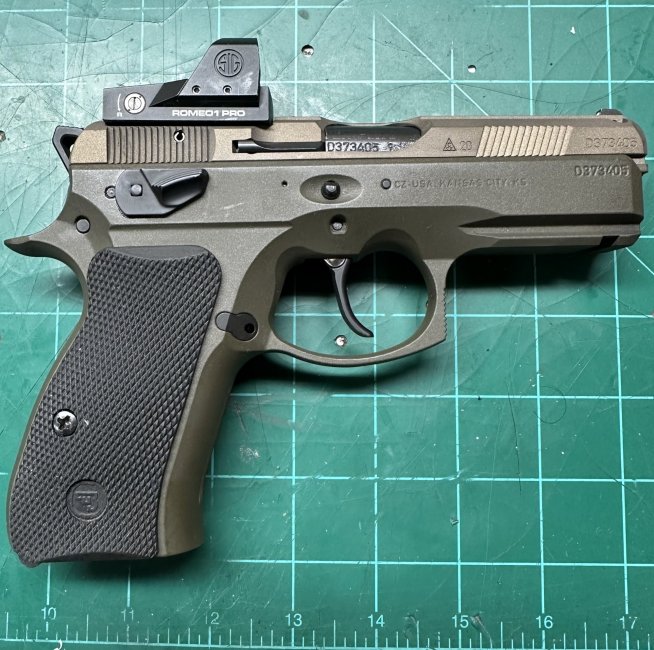
    Brought the CZ home, dropped a Romeo off another that was sighted in and it would not sight in either.

    What I had done was drop the slide onto parallels and milled it, without realizing the top of the slide was not parallel to the rails of the CZ, and I was indicating off the top.
    Ended up milling a 1 degree forward slope in it, which is apparently necessary for some guns as they sell a 1 degree shim.

    Remounted the Romeo and sighted in very nicely. Wasn’t sure about the titanium cerakote on the slide, thought darker might be better and needed to treat the newly cut area anyway, so went with smoked bronze.

    6444E0A2-6A96-4AA7-8573-D6DF7EDD054F.jpeg


    Many thanks to AllenM for helping me figure the problem out!!
     

    ditcherman

    Grandmaster
    Site Supporter
    Rating - 100%
    22   0   0
    Dec 18, 2018
    7,711
    113
    In the country, hopefully.
    We may as well turn this into the machinist thread. :)
    Wait it’s not? Am I in the wrong place again? (The CZickos have been very patient with our goings-on)

    Also, I think there could stand to be an arts and crafts sub forum. I’ve got “probably how not to make holsters” and “adventures in cerakoting” titles picked out and I know @SmileDocHill would love to have a sewing thread.
     

    russc2542

    Master
    Rating - 100%
    24   0   0
    Oct 24, 2015
    2,126
    83
    Columbus
    To continue my saga into my first optic mill, took that finished product to the range with the Eotech and it wouldn’t sight in, shot low with adjustment all the way towards ‘up’. At the same time, shot a p320 with an Eotech on it and the dot went berserk, which I’ve documented elsewhere. They’re sent off and I’ll update that thread when I know more.

    Brought the CZ home, dropped a Romeo off another that was sighted in and it would not sight in either.

    What I had done was drop the slide onto parallels and milled it, without realizing the top of the slide was not parallel to the rails of the CZ, and I was indicating off the top.
    Ended up milling a 1 degree forward slope in it, which is apparently necessary for some guns as they sell a 1 degree shim.

    Remounted the Romeo and sighted in very nicely. Wasn’t sure about the titanium cerakote on the slide, thought darker might be better and needed to treat the newly cut area anyway, so went with smoked bronze.

    Many thanks to AllenM for helping me figure the problem out!!
    Allen and I also had some back and forth on this for the same reason. The top of the slide (or any external feature of the slide) is not parallel with the barrel. doh!
     
    Top Bottom